Connecting Your Twitter
- 27 Feb 2024
- Print
- DarkLight
- PDF
Connecting Your Twitter
- Updated on 27 Feb 2024
- Print
- DarkLight
- PDF
Article summary
Did you find this summary helpful?
Thank you for your feedback
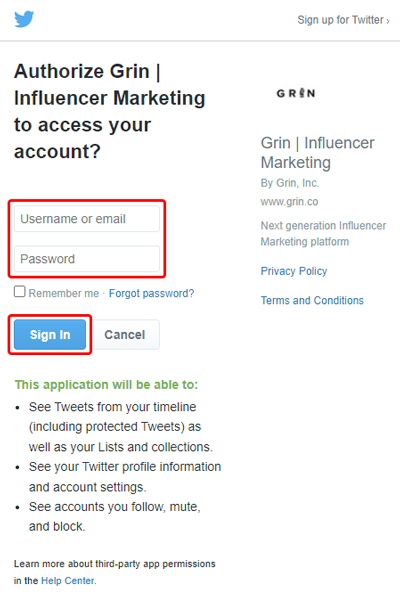
By connecting your Twitter, GRIN can automatically pull in your videos and engagement numbers to deliver to the brands you are collaborating with. While you’re going through the connection process, you’ll be asked to grant specific permissions so GRIN can read and sync with your content as well as read information available on your Twitter profile. You must accept all permissions for your brands to view your videos and metrics. These permissions do not give GRIN permission to post on your behalf or view or change your sensitive account information.
Note
If you don't connect your Twitter and your brand requests Twitter content and metrics, you'll need to manually upload and provide those stats for each post on your Live Site. You can read more about manually uploading content with our help article Manually uploading content.
What you'll need
- A Twitter account
- A Live Site. If you don’t have a Live Site yet, contact your collaborating brand to generate a link for you.
- If you have multiple Live Sites with different brands and want to share your social network connections between them, which means you’ll only need to log in to each network once for all your Live Sites, you’ll also need the following:
- Verify each of your Live Sites. You can learn how to verify with our help article Verifying your account.
- The same email address set in your Live Site’s Settings. You can learn how to update your email address with our help article Managing Settings.
- You’re part of at least one program in each Live Site
How to do it
- Navigate to your Live Site > Networks.
- Next to Twitter, select Connect.
- If you already connected your Twitter account on another Live Site, you’ll be prompted to automatically connect the same account on your current Live Site. You can review your options to auto connect below. If you aren't prompted with these options, skip this step and move on to Step 4.
- If you want to connect your account automatically and you only have one other Live Site to log in to, select Yes, auto connect. This will finish the connection process, and you can skip the rest of the steps in this article.
- If you want to connect your account automatically and you have two or more Live Sites you can log in to, toggle on which brands' Live Sites you want to connect to, then select Yes, auto connect. This will finish the connection process, and you can skip the rest of the steps in this article
- If you want to connect your account manually, select No, proceed to manually connect and continue to Step 4.
- If you're not logged in already, review the connection permissions
- Enter your login information and select Sign In.

- If you have other Live Sites, you’ll be prompted to automatically connect your Twitter to those Live Sites as well. You can review your options to auto connect below. If you aren't prompted with these options, then you can skip this step.
- If you want to connect your account automatically and you only have one other Live Site to log in to, select Yes, auto connect.
- If you want to connect your account automatically and you have two or more Live Sites you can log in to, toggle on which brands' Live Sites you want to connect to, then select Yes, auto connect.
- If you don’t want to connect your account to other Live Sites, select No, I’ll do this later.
That’s it! You’ll be redirected back to your Live Site, and your Twitter should now be connected. Now, your collaborating brands will now be able to automatically view your posts and metrics!
Was this article helpful?

