Creating Products
- 17 Jan 2024
- Print
- DarkLight
- PDF
Creating Products
- Updated on 17 Jan 2024
- Print
- DarkLight
- PDF
Article summary
Did you find this summary helpful?
Thank you for your feedback
Once you've created a Brand, you can create products within it that you can add to any creator marketing programs you create in GRIN with that Brand. You can then choose which products to make available to creators added to that creator marketing program.
What you'll need
- A configured Brand. Check out our help article for more information.
How to do it
- Navigate to Brands > Products on the Brand you want to add products to.
.png)
- Select Add Product > New Product. This will open a new page to configure a new product.
.png)
- In Step 1. Product Details, fill in the following fields:
- Product Name: The name of your product that will appear to both you and your creators. This field is required.
- Product Collection: The Collection you want to add your product to.
- Product Description: A description of your product that will appear to both you and your creators.
- Does this product have options?: Indicate if your product has variants that you want to include for your creators. Variants include options such as different colors or sizes of the product. Selecting Yes enables Step 3. Product Options and Step 4. Product Variants.
- Product SKU: An internal SKU for your product. If you selected Yes in Does this product have options?, this field will be removed, and you can instead assign SKUs to each individual product variant in Step 4. Product Variants.
- Product Image: An image of your product that will appear to both you and your creators.
- Select Step 2. Price & Shipping and fill in the following fields:
- Product Cost (Internal): The cost of the product that will only appear to users in your GRIN account
- Product MSRP (Public): The price of the product that will appear to your creators.
- Requires Shipping?: Indicate if your product needs to be shipped.
- Shipping Cost (Internal): The cost of shipping the product that will only appear to users on your GRIN account. This field is only available if you select Yes for Requires Shipping.
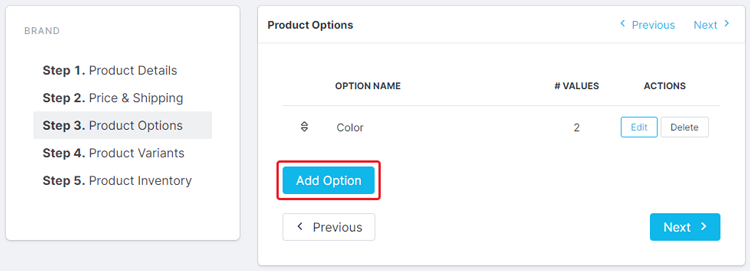
- If available, select Step 3. Product Options and select Add Option to start adding an option for your product. Otherwise, skip to Step 12.
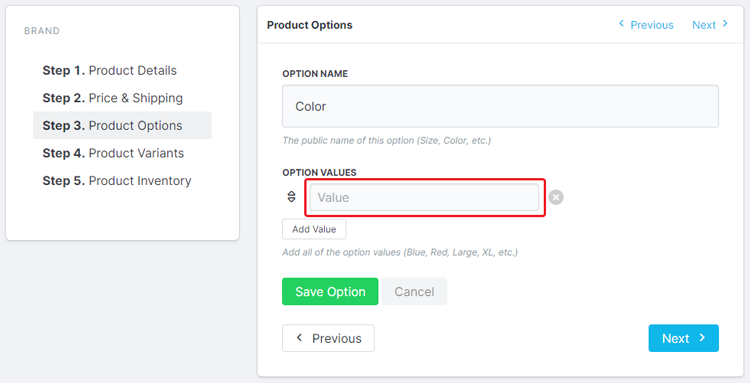
- Enter an Option Name which will appear to both you and your creators, then select Add Value and add individual Values creators can choose for the product. You can select Add Value to keep adding more options.

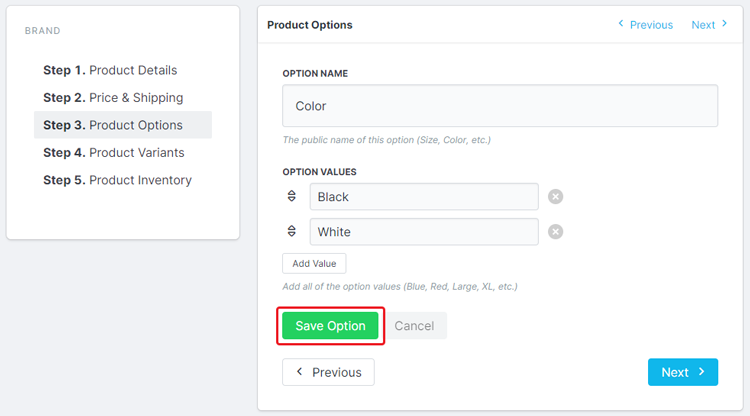
- After adding as many values as you need, click Save Option.

- If desired, select Add Option to add another product option.

- Repeat Steps 6-8 to add as many product option values and product options you need.
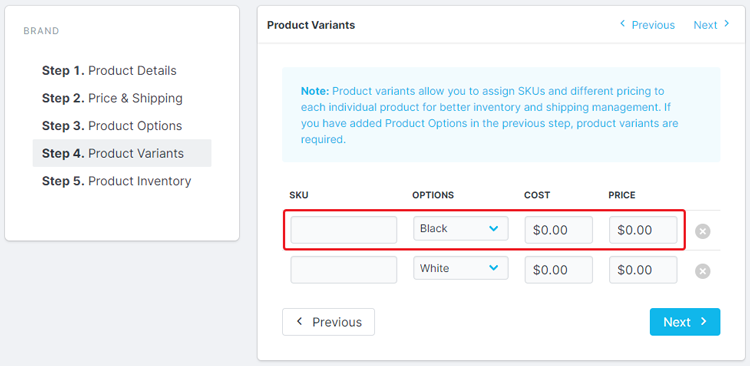
- If available, select Step 4. Product Variants and add variants for each product option you created in Step 3. Product Options by either:
- Selecting Add Variant to add a product variant one at a time for each product option.
- Selecting Add All Variants to automatically generate the number of product variants you need.
Note
If you included product options in Step 3. Product Options, you must create product variants in Step 4. Product Variants.
- For each product variant, fill in the following fields:
- SKU: The variant's SKU.
- Options: The product option the SKU will be associate with.
- Cost: The internal cost for the variant that will only appear to users on your GRIN account.
- Price: The price of the variant that will appear to your creators.

- Select Step 5. Product Inventory and fill in the following fields:
- Track Inventory?: Indicate whether you want to track how many of your product you have in stock in GRIN.
- Track Variant Inventory?: Indicate whether you want to track your inventory for each product variant. This field is only available if you select Yes for Track Inventory and if you have product variants. Depending on your choice, you must complete the following:
- If you chose Yes, provide an Available QTY for each product variant in the list
- If you chose No, provide a Global Quantity for all your products
- Select Save.
Your product has now been created. Now, when you go to your Brand's Products page, you will see your product along with information about it, such as its collection, SKU, cost, and more. You can also use your created product in your creator marketing programs to send to creators or have it available for them to select.
Was this article helpful?

