- 19 Aug 2024
- Print
- DarkLight
- PDF
Creators
- Updated on 19 Aug 2024
- Print
- DarkLight
- PDF
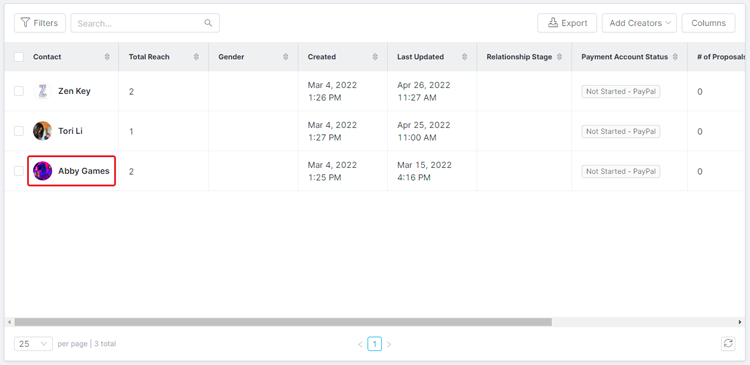
In Creators, you can view all the creators you've added in GRIN as well as helpful information, such as their names, contact information, payment account statuses, and more. You can learn how you can access and filter this information in this article.
How to Do It
Navigate to Contacts > Creators. This will open the Creators table, which has a few basic tools you can use. At the top of the table are:
.png)
- Filter: Select fields to filter your creators by.
- Search: Enter keywords into the search bar to search your list of creators.
- Views: Save your current filtered table as a saved view. You can have up to five saved views per table.
- Export: Export a CSV file of your creators.
- Add Creators: Manually add more creators by:
- Add a Creator: Add a creator by entering their name, email, and social networks.
- Import Creators: Add creators by importing them from a CSV file.
- Columns: Customize what columns appear in your table.
There are also bulk actions you can take with your creators. First, select one or more creators by selecting their checkbox. This will display the following actions you can apply to your selected creators. They are:
.png)
- Export: Export a CSV file of your selected creators.
- Archive: Archive your selected creators. Archived creators won't be tracked for conversions or content, but you'll still be able to access their historical data. They do not count towards your overall CRM capacity.
- Sequences: Send an email sequence to your selected creators. For more information, see Creating an email sequence.
- Send Email: Send an email to your selected creators. For more information, see Composing emails.
- Tags: Edit your selected creators' tags. For more information, see Managing tags.
- Activation: Add your selected creators to an Activation. For more information, see Creating an Activation.
- Edit: Show additional options to edit your creators.
- Change Owner: Change your selected creators' owner. The creator's owner will be notified whenever their creator has any activity.
- Set Custom Property: Change your selected creators' custom properties. For more information, see Managing Custom Properties.
- Change Relationship Stage: Change your selected creators' relationship stages.
- More Options: Show more ways you can work with your selected creators
- Send Alert: Send an email alert to your selected creators.
- Assign Discount Code: Generate and assign an existing discount code group to your selected creators. For more information, see Discount Codes.
- Assign Affiliate Link: Generate and assign an existing affiliate link group to your selected creators. For more information, see Affiliate Links.
- Compare Creators: Open a popup comparing the statistics of all your selected creators on available social networks.
- Delete: Delete your selected creators. Unlike archiving creators, deleting creators will permanently remove your creators completely from your Creators table and from any programs they're in, as well as delete any data related to the creator from GRIN. This includes historical data and assigned discount codes or affiliate links.
Finally, you can select an individual creator's name to navigate to their contact profile. For more information on contact profiles, check out our help article Creator Contact Profile Overview.


