Exporting Content
- 06 Sep 2024
- Print
- DarkLight
- PDF
Exporting Content
- Updated on 06 Sep 2024
- Print
- DarkLight
- PDF
Article summary
Did you find this summary helpful?
Thank you for your feedback
Whenever creators post content for your marketing programs or use your tracked hashtags and mentions, that content will be added to your GRIN Content libraries. From there, you can look over all your content at a glance as well as export content for you to repurpose for your brand.
You can export content in two ways:
- Download the content onto your device.
- Sync your content to the cloud using GRIN's cloud content integrations.
Note
If you have content posts with multiple images or videos in a single post, such as an Instagram Carousel, each of the images or videos will appear as its own piece of content in GRIN. This means that if you want to export all the content from that post, you'll need to export multiple pieces of content in GRIN.
What You'll Need
- At least one piece of content in any of your Content libraries, which includes Creator Content or the Media Library.
- If you’re syncing to the cloud, an existing account with our offered cloud content integrations. Currently, these integrations are:
- Dropbox: See Integrating with Dropbox to learn more.
- Google Drive: See Integrating with Google Drive to learn more.
- Box: See Integrating with Box to learn more.
GRIN will complete your content export in the background and will notify you when the export completes. If you are exporting a large amount of content or large file sizes, your export may take longer to finish. Feel free to navigate away from your library and use other parts of GRIN in the meantime.
How to Do It
- Navigate to Content > Creator Content or Content > Media Library.
- Select which pieces of content you want to export.
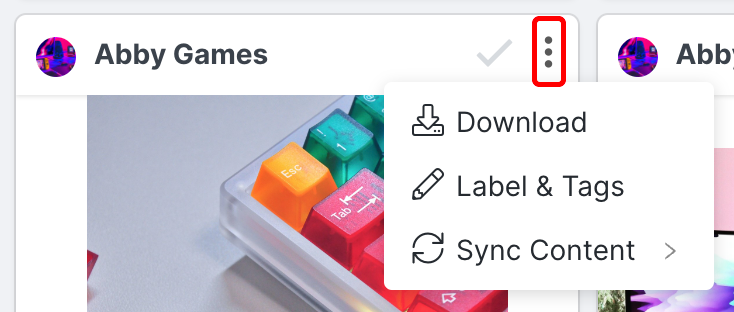
- If you want to export one content piece, then select More Options on it. Then, select either Download to save a copy of the file on your device, or select Sync Content and choose your cloud content integration to sync to.
 Select More Options to export single content pieces.
- If you want to export multiple pieces in bulk, then select the checkmark on each piece of content. Then, select the bulk options from the toolbar and choose either to Download the content as files onto your device or Sync Content to sync it to a cloud content integration of your choice.
.png) Select multiple content pieces and export them in bulk.
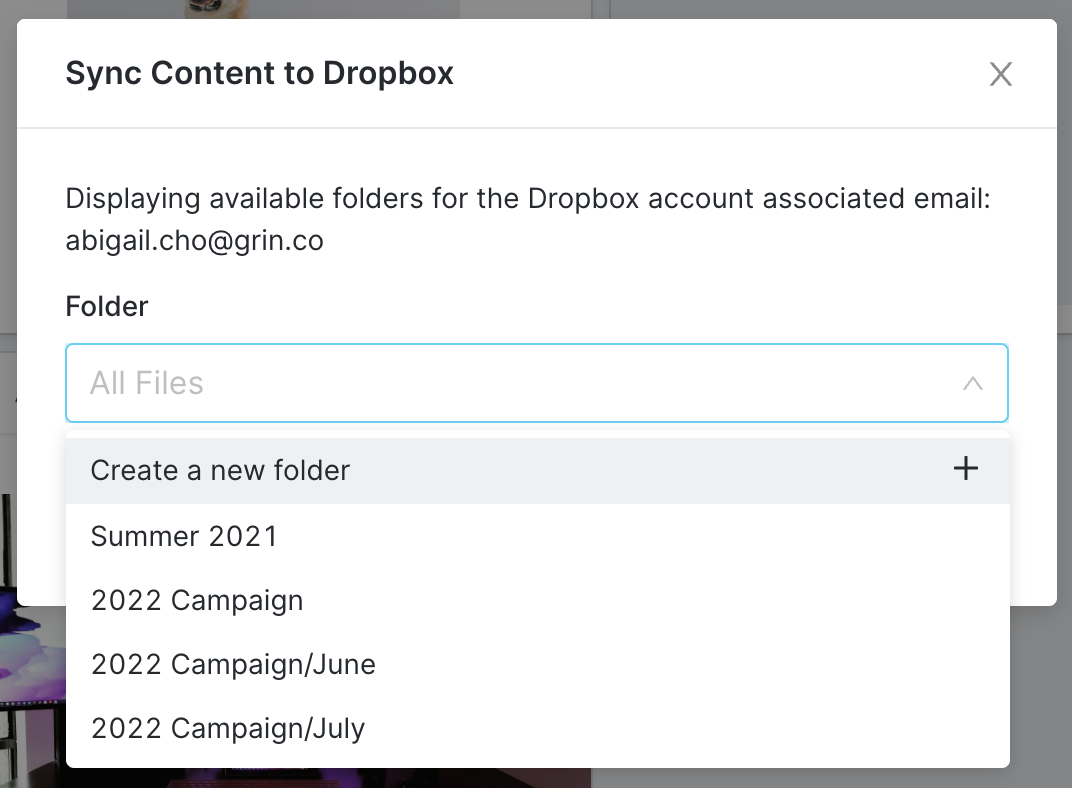
Select multiple content pieces and export them in bulk.- If you chose to sync to a cloud content tool, you also need to choose a folder to save your content to. You can also Create a new folder if needed. Then, select Submit.
 Select a folder or create a new one.
The export process should now start for your selected content. Depending on how you chose to export, you'll get your content in different ways:
- If you chose to Download your content, you'll receive a notification in GRIN and in your email that your ZIP file with your content is ready. Once finished, an Admin user on your GRIN account will be able to access the notification and download the file to their device. Non-admin users cannot download the file.
- If you chose to Sync your content, you'll receive a notification in GRIN that your sync is complete, and your content will appear in your content sync tool in the folder you chose.
Was this article helpful?

