- 14 Jun 2022
- Print
- DarkLight
- PDF
Installing the GRIN Magento Module
- Updated on 14 Jun 2022
- Print
- DarkLight
- PDF
To finish integrating with Magento, you must install GRIN’s Magento Module. This will allow GRIN to fully access your Magento instance, its products, and more so you can seamlessly use Magento within GRIN.
The full installation process consists of three parts:
- Installation
- Configuration
- Webhook verification
All of these parts, as well as an additional Troubleshooting section, will be described below.
What You'll Need
- A webhook authentication token. To get a token, you must first integrate with Magento, then contact GRIN Support to obtain the token. For more information on integrating with Magento, see our help article Integrating with Magento.
- Composer v1, which you can download directly from Composer. If your server is running Composer 2.X, you can download Composer v1 to the working directory, then explicitly use the v1 executable with any composer command by specifying
./composer.pharfor any composer related commands, as shown below.
curl -O "https://getcomposer.org/download/1.10.22/composer.phar"

// Downloads v1 version of Composer

chmod a+x composer.phar

// Sets the file as executable
How to Do It
Installation
- SSH to your Magento store.
- Navigate to the root directory.
- Run the following commands:
composer config repositories.grin vcs https://github.com/grininc/grin-magento-module

composer require grin/module

// If you see warnings about installing Composer v2 ignore them.
// Magento does not currently support Composer v2

bin/magento setup:upgrade

bin/magento setup:di:compile

bin/magento setup:static-content:deploy

bin/magento cache:flush

// Optional command to ensure the module is enabled
bin/magento module:status | grep Grin_Module

// Make sure the cron is running

bin/magento cron:run
The GRIN Module should now be installed in your Magento 2 store instance.
Configuration
Once you’ve installed the GRIN Magento Module, you must configure the module to work with your store.
- Log in to your Magento 2 Admin Dashboard.
- Navigate to Stores > Configuration. This will open your store’s Configuration settings.
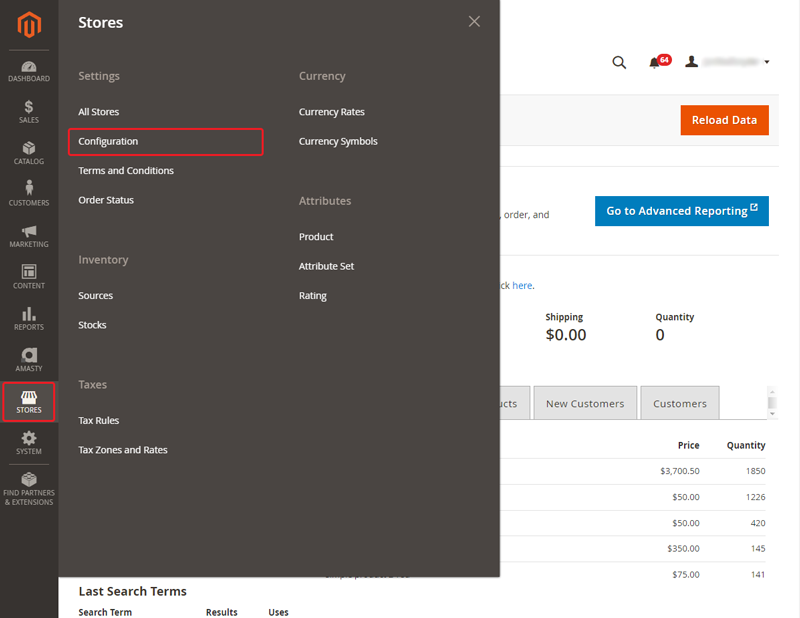
- Navigate to Services > GRIN (Influencer Marketing).
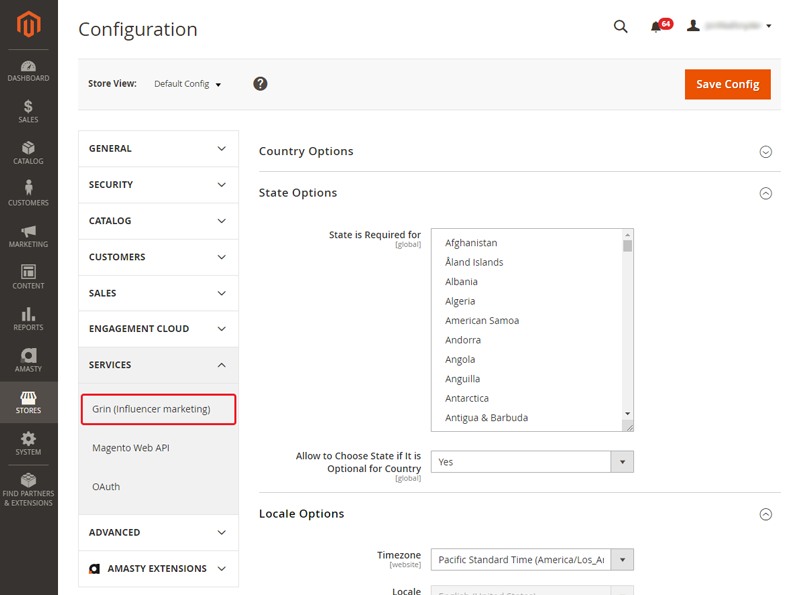
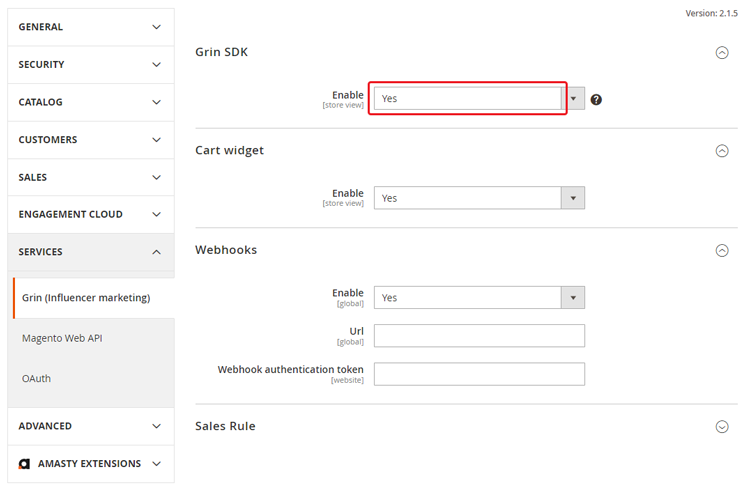
- Set the GRIN SDK > Enable field to Yes. This enables GRIN’s affiliate tracking scripts.
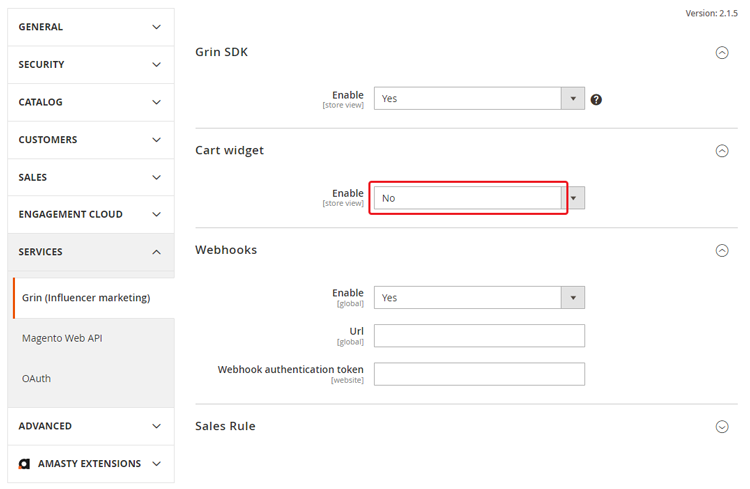
- Set the Cart widget > Enable field to No.
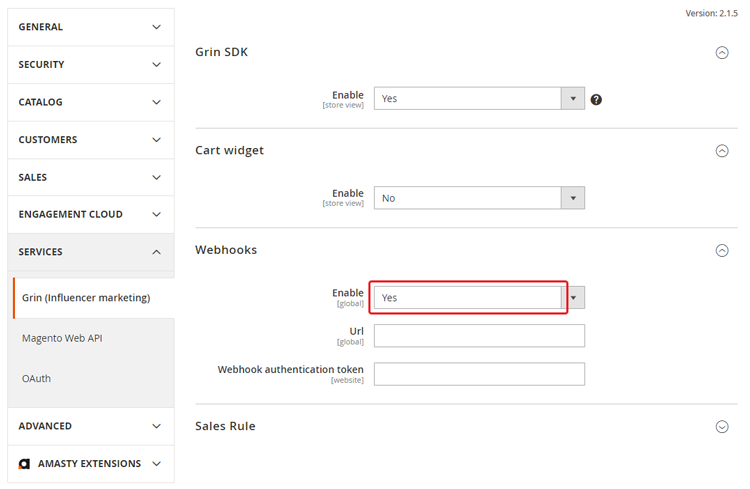
- Set the Webhooks > Enable field to Yes. This enables webhooks.
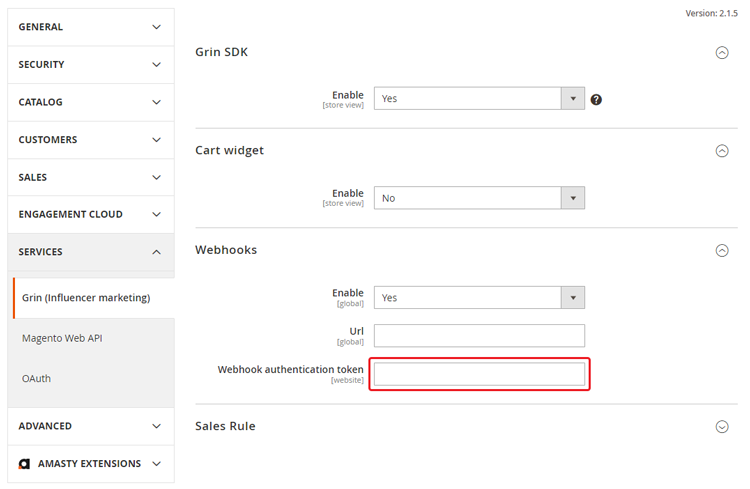
- Enter your webhook authentication token in the Webhooks > Webhook authentication token field.
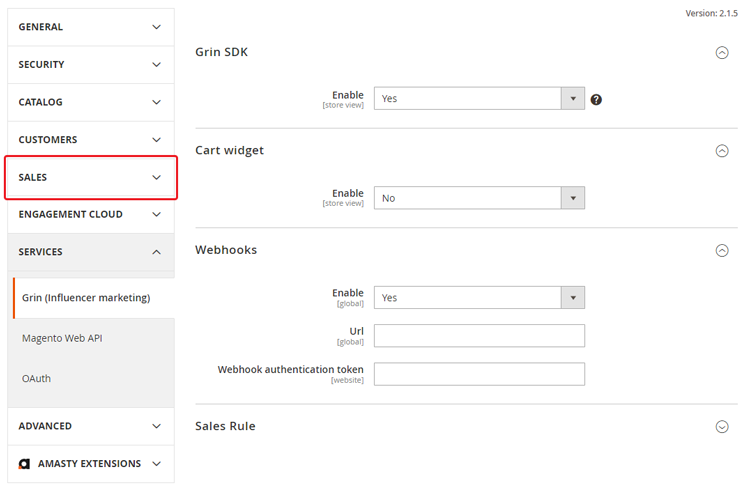
- Click Sales.
- Click Shipping Methods.
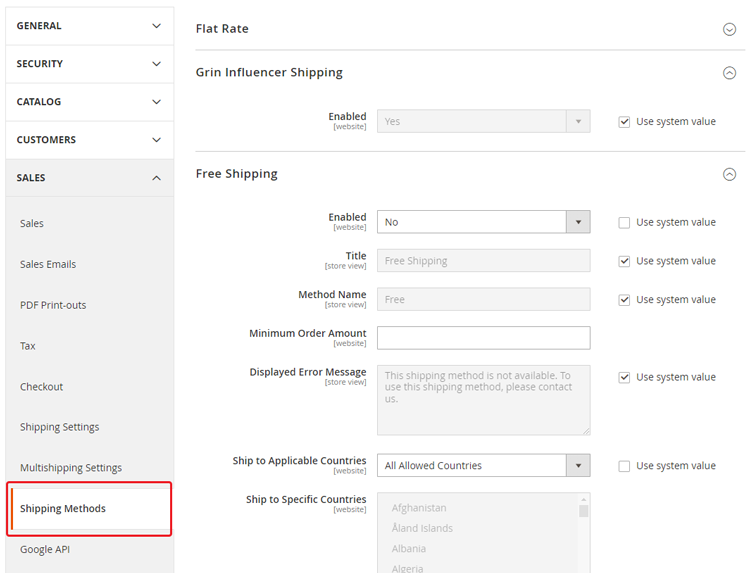
- Set the GRIN Influencer Shipping > Enabled field to Yes.
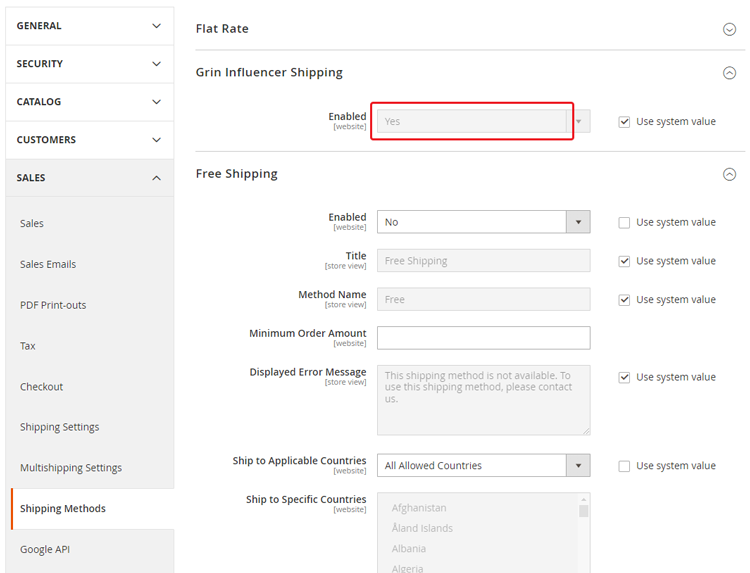
Your GRIN Module is now configured to work with your Magento 2 store instance.
Webhook Verification
- Generate a webhook message. You can do this by modifying the quantity or description of an existing product.
- Navigate to System > GRIN Module Queue Messages. This will open your GRIN Module Queue Messages table.
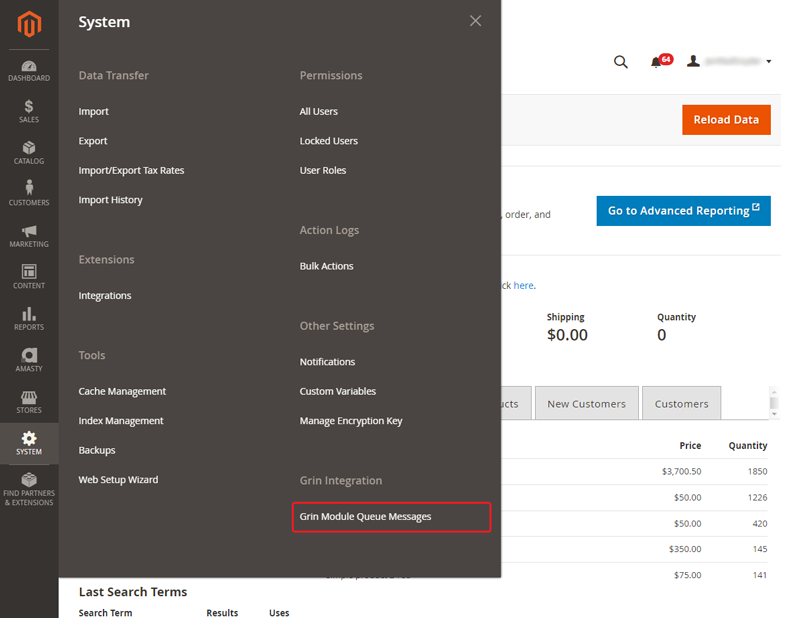
- Confirm the Status with each record reads as “Complete”.

Troubleshooting
If the Statuses of your records appear as “New” or “Error” when verifying your webhooks, then you can check the following solutions to troubleshoot. If you continue to have errors, contact GRIN Support.
- Run the Magento 2 Cron Processes
The grin webhook process may need to be killed and the Magento CLI cron command should be run, as shown in the code block below.
// Kill any processes related to the GRIN Module still listed

ps -aux | grep grin_module_webhook
kill <pid>

// Run the Magento 2 cron processes
bin/magento cron:run- Manually Add Webhook to the Cron
The grin_module_webhook may not have been automatically added to the cron. If this is the case, confirm that the queue job was added to the /app/etc/env.php file.
...
   'cron_consumers_runner' => [
    	'cron_run' => true,
    	'max_messages' => 20000,
    	'consumers' => [
           'consumer1',
           'consumer2',
           'grin_module_webhook',
	     ....
         ]
    ],
...
That’s it! The GRIN Magento Module should now be successfully installed and configured. Now, you’ll be able to utilize your Magento store within GRIN.

