- 15 Nov 2024
- Print
- DarkLight
- PDF
Integrating with Klaviyo
- Updated on 15 Nov 2024
- Print
- DarkLight
- PDF
You can now integrate your existing Klaviyo account into GRIN. This is great if your brand already has existing marketing campaigns and you would like to add Creators from GRIN into Klaviyo, while still keeping GRIN as your center for communication.
What You'll Need
- A Klaviyo account.
- Your Brand set up in GRIN that you want to integrate Klaviyo with. Click here for more information on setting up a Brand.
- Your Klaviyo API Key with full key access.
How to Do It
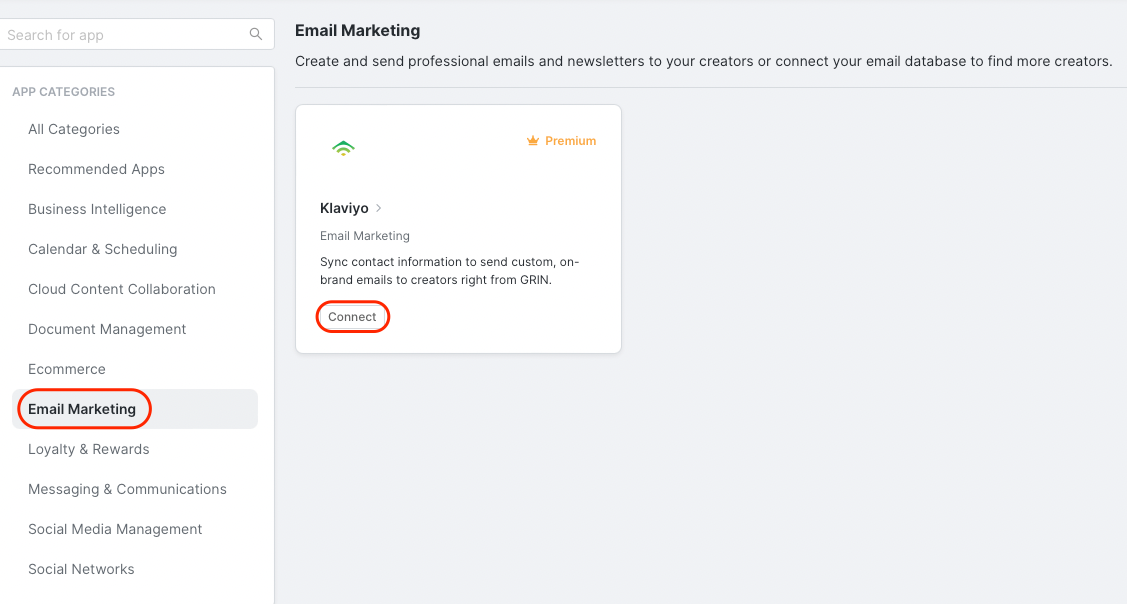
- Navigate to Account > App Marketplace.
- Select Email Marketing > Klaviyo and press Connect.
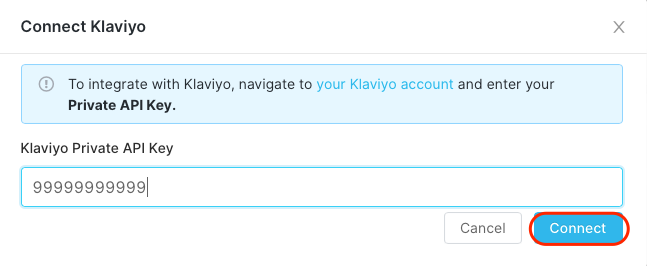
- You will be asked for your private Klaviyo API key. You can read more on how to generate this key on Klaviyo's page for How to Manage Your Account's API Keys.
- If your private Klaviyo API key is in the Read-only scope, this will not work. You would need to ensure that your private API key has full key access. You can learn how to create a private API key on Klaviyo's page for How to Create or Clone a Private API Key.
- To do this, you can follow these steps:
- Visit your Klaviyo account.
- Click Settings.
- Click API Keys.
- Click Create Private API Key (there is not a way to edit an existing token).
- Enter Name.
- Choose Full Access Key.
- Click Create.
- Once your private Klaviyo API key is entered, click Connect.
Customizing Your Sync
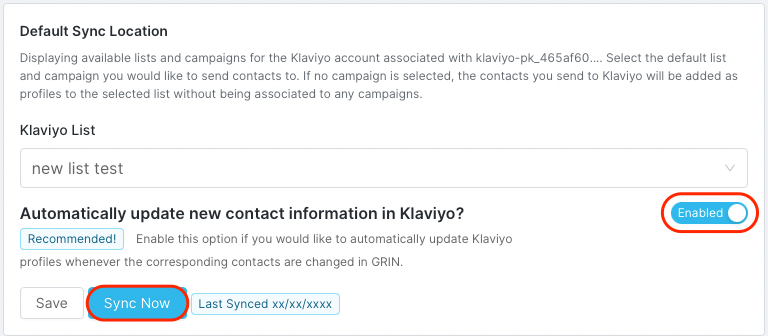
1. Once successfully connected, make sure you click View Settings so you can tailor your Klaviyo sync. You can navigate back to this menu at any time from Account > Settings > Integrations.

2. Set your Default List Location. This is the default list where your My Creators list from GRIN syncs with your lists within Klaviyo.

3. Next, you can Enable to Automatically Update New Contact Information within Klaviyo. This is recommended so that Klaviyo profile data stays up to date with your changes in GRIN. You may also manually sync from here if desired using the Sync Now button.
Syncing to Klaviyo Inside GRIN
1. You can select which contacts are sent into Klaviyo by navigating to My Creators, then selecting the creator(s) you wish to export.
2. Navigate to the more info button in the top right, and select Send to Klaviyo.
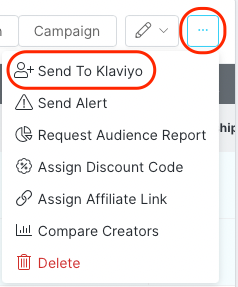
2. In the pop-up modal, you can select a destination list within Klaviyo. If you have selected one, your default list will appear here automatically.
.png)
3. You should see a success message at the bottom right of your screen.

4. In your creator's profile within GRIN, you should now see a Klaviyo icon letting you know it's syncing with your Klaviyo list.
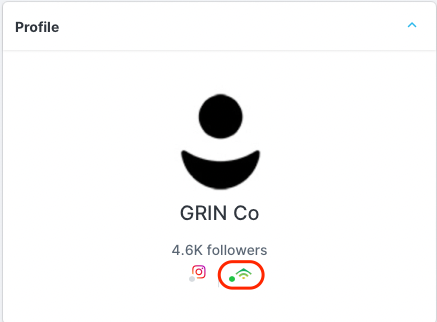
5. You can also see all successful syncs with Klaviyo at any time by going to your Account and selecting Data Exports.

- Contacts within GRIN must have an email address to export to Klaviyo.
- You may get a message to Skip Contacts if they already exist within Klaviyo.
- My Creators list will sync with Klaviyo, but Prospects and Applicants do not.
- The dynamic variables synced from GRIN can be used in Klaviyo for email templates. Read more on this in Klaivyo's article on How to Insert Template Tags and Variables.
Klaviyo and GRIN Property Variables
When GRIN syncs creators' properties to Klaviyo, some are mapped to existing default ones in Klaviyo, but others will appear as custom properties instead. You can view all the GRIN properties that are synced and their Klaviyo equivalents below.
| GRIN Property Name | Klaviyo Property Name | Klaviyo Property Type |
|---|---|---|
| First Name | First Name | Default |
| Last Name | Last Name | Default |
| Company | Organization | Default |
| Phone Number | Phone Number | Default |
| Default | ||
| Street Address (Primary) | Address | Default |
| Apt, Suite, Etc. (Primary) | Address 2 | Default |
| City (Primary) | City | Default |
| State (Primary) | State / Region | Default |
| Zip Code (Primary) | Zip Code | Default |
| Country (Primary) | Country | Default |
| Owner | GN_Owner | Custom Property |
| Tags | GN_Tags | Custom Property |
| Relationship Stage | GN_RelationshipStage | Custom Property |
| Contact Type | GN_ContactType | Custom Property |
| Instagram URL | GN_InstagramURL | Custom Property |
| Live URL | GN_LiveURL | Custom Property |
| Discount Code Group | GN_DiscountCodeGroupName | Custom Property |
| Affiliate Link Group | GN_AffiliateGroupName | Custom Property |
| Custom Property | GN_CustomPropertyName | Custom Property |
Using Klaivyo Column Headers Inside GRIN
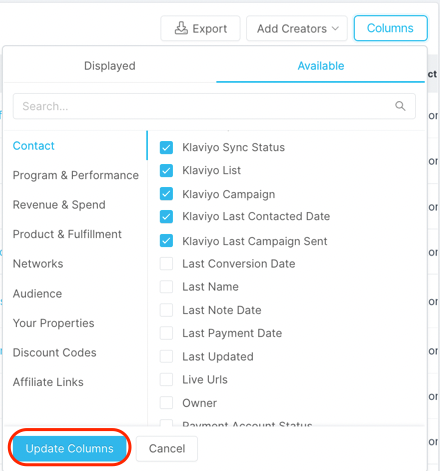
1. Navigate to My Creators and click on Columns > Available.
2. Here you can optionally select the following columns synced from Klaviyo:
- Klaviyo Sync Status:This helps you identify which GRIN contacts are in Klaviyo and the state of their sync.
- Failed: There was an error syncing this contact.
- Success: Successfully synced to Klaviyo.
- Blank: The contact has never been synced.
- Klaviyo Lists: This will denote the titles of all lists that the creator is in from your Klaviyo lists.
- Klaviyo Campaign: This will denote all the campaigns a creator is in.
- Klaviyo Last Contacted: The date is just the time stamp for the last email sent via Klaviyo to that creator.
- Klaviyo Last Campaign: The date is the last content sent to the creator.
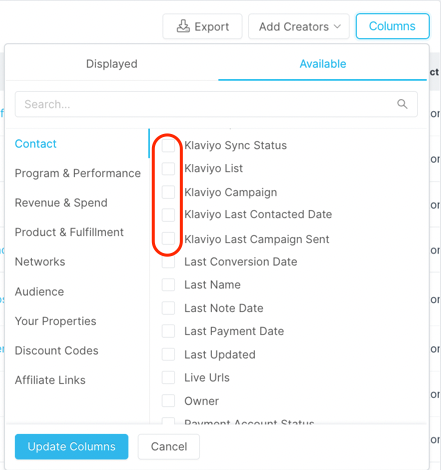
3. Once selected, press Update Columns. Now your list within My Creators will have any of the Klaviyo columns you've selected, to allow for easy sorting.
