- 15 Nov 2024
- Print
- DarkLight
- PDF
Integrating with Salesforce Commerce Cloud
- Updated on 15 Nov 2024
- Print
- DarkLight
- PDF
You can integrate your Salesforce Commerce Cloud (SFCC) store so you can create, fulfill, and track your influencers' orders from within GRIN. This is ideal for managing large numbers of orders and scaling up your influencer program!
Before you can connect to the Commerce Cloud from within GRIN, you'll need to configure a few additional credentials in your Commerce Cloud by Connecting to GRIN. You'll also need to enable order fulfillment and affiliate conversion tracking by Installing the Cartridge. Finally, you'll need to specify how the integration will function on both GRIN and the Commerce Cloud platforms by Configuring Settings. We’ll go through each part of the process below.
What You'll Need
- A Salesforce Commerce Cloud account with Administrator access.
- The brand you want to integrate with already set up in GRIN.
Part 1: Access the Open Commerce API
To allow GRIN to integrate smoothly with Salesforce Commerce Cloud, you’ll create an API client, a Business Manager user, and a Business Manager role to access the Open Commerce API. The API client will let GRIN access your Commerce Cloud’s Products, Categories, Coupons, Customers, Baskets, and Orders. Business Managers are needed to create orders on behalf of your Influencers when they request products through GRIN. Business Managers will also apply price adjustments to these orders based on settings you’ll configure in Part 4: Configuring Settings. Once you create all of those items, you’ll be able to connect to GRIN.
Creating the API Client
- Log into your Salesforce Commerce Cloud Account Manager.
- Click API Client in the navigation menu.
- Click the Add API Client button in the API Clients window that appears. This will open the Add API Client form.

- Enter a Display Name, a Password, and Confirm Password for your new API Client under General Settings.

- Click the checkbox to enable access controls under Access Control.

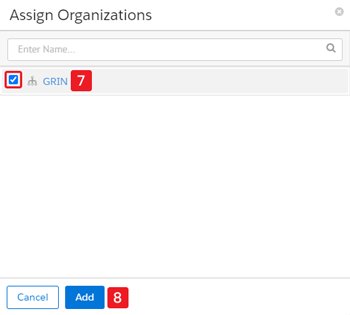
- Click Add under Organizations. This opens the Assign Organizations popup.

- Select your store's organization.
- Click Add. Your organization should now be listed.
- Click Add under Roles. This opens the Assign Roles popup.

- Select the Salesforce Commerce API role.
- Click Add. The role should now be listed.
- Click the Filter icon from the Salesforce Commerce API role. This opens the Salesforce Commerce API - Filters popup.

- Select your organization in the dropdown menu.
- Select the production and staging environments in the window that appears.
- Click Add.
- Skip all the JWT fields.
- Skip to the Token Endpoint Auth Method field in the OpenID Connect section.
- Set the Token Endpoint Auth Method to client_secret_post.
- Set the Access Token Format to JWT.
.png)
- Click Save.
After saving, you will be redirected to a list of your existing API clients. You should now see your new API client in the list.
Updating Open Commerce API Settings
Now that you have your API client, you must update the settings to connect to GRIN.
- Log into your Salesforce Commerce Cloud Business Manager
- Click on Administration > Site Development > Open Commerce API Settings. This will open the Open Commerce API Settings editing window.
- Select Shop in the Select Type dropdown field.
- Select Global (organization-wide) in the Select Context dropdown field.
.png)
- Download the Shop JSON file.
- Replace
API_CLIENT_IDwith your API client’s Client ID in the file. - Add the updated file to your API client’s Settings.
- If you do not have any existing clients, you can copy and paste the JSON file directly into your Settings.
- If you do have existing clients, you must add GRIN’s API client settings according to the settings you already have.
- Change the Select Type dropdown field to Data. Keep the Select Context option as Global (organization-wide).

- Download the Data JSON file.
- Replace
API_CLIENT_IDwith your API client’s Client ID in the file. - Add the updated file to your Settings, keeping in mind your existing settings, if any.
Creating a Business Manager User
The Business Manager user is the user that will fulfill orders made by your Influencers in Salesforce Commerce Cloud. Depending on your version of SFCC, there are two different ways to create a Business Manager user: through Salesforce’s Business Manager or through Salesforce’s Account Manager. If you’re unsure which one to use, reach out to your integration partner or developer.
If you're using Business Manager:
- Navigate to Administration > Organization > Users.
- Click the New button.
- Fill in the required fields in the user form.
- Check the box next to Enabled.
If you're using Account Manager:
- Click on User in the navigation menu.
- Click the Add User button in the new Users window.
- Provide an email address for the user.
- Note: You will need to access this email to activate the user’s account.
- Enter “GRIN ” for the first name.
- Enter “API ” for the last name.
- Click the Add button under Organizations.
- Select the organization for your store.
- Click the Add button under Roles.
- Search for “Business ” in the search bar that appears.
- Check the box next to Business Manager User.
- Click Add.
- Click the Filter icon next to the Business Manager User role that appears in the list.
- Select your organization.
- Check the box next to Production and Staging in the list of available instances that appear.
- Activate your account by going to the email you provided in Step 3 and clicking on the activation link.
- Log into the Business Manager instances you are connecting to using the new account to create the link between the account and the Business Manager.
You should now have a business manager user in Salesforce.
Creating a Business Manager Role
The Business Manager role will have permission to fulfill orders on behalf of your influencers in your Commerce Cloud. While the Business Manager user can have the same permissions, having a role is more convenient because you can always add more users to the role without configuring each user’s permissions each time.
- In your Business Manager, navigate to Administration > Organization > Roles & Permissions. This opens the Roles management window.
- Click the New button. This opens the New Role window.
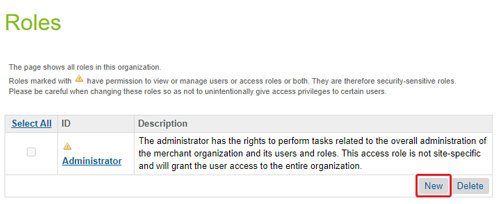
- Enter “GRIN Role” for the ID.
- Enter “Order, customer, and adjustment permissions for GRIN" for the description.
- Click the Apply button to create the role.
.png)
- Click the Functional Permissions tab.

- Check the Sites box in the Select Context window that appears.
- Click the Apply button.
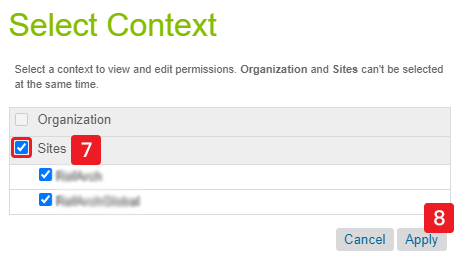
- Check the box next to the following:
Adjust_Item_PriceAdjust_Shipping_PriceAdjust_Order_PriceCreate_Order_On_Behalf_OfSearch_Orders
- Click Update to save the role.
- Click on the Users tab.

- Click the Assign button.
- Check the box next to the Business Manager user you created in the last section.
- Click Assign to assign the Business Manager role to the user. The user should now appear in the list of users with the Business Manager role.
- Click Update.
You should now have a Business Manager role with the Business Manager user assigned to it.
Part 2: Installing the Cartridge
While you’re now connected, there are still some configurations that need to be completed before you can access your store’s full functionality from within GRIN. One of these is to install and configure the cartridge and metadata to your Commerce Cloud environment.
- Download the cartridge and metadata files.
- Unzip the file. Notice there are two directories:
int_grin(the cartridge)config(system object type extensions)
- Copy the
int_grindirectory to your environment and upload it to the staging environment. - Log into your Business Manager.
- Navigate to Administration > Sites > Manage Sites. This will open the Storefront Sites window with a list of your sites.
- Click the site you’re integrating with GRIN. This opens the window to manage your site.
- Click the Settings tab.

- Add
int_grinto the beginning of the path in the Cartridges section and click Apply..png)
- Navigate to Administration > Site Development > Site Import & Export. This opens the Site Import & Export management window.
- Click the Choose File button under the Import section.
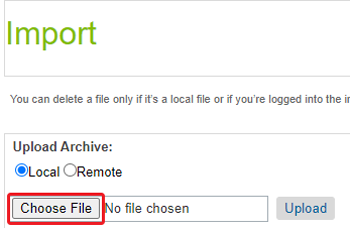
- Open the
configdirectory and select thegrin-configuration-settingszip file. - Click Upload. The
grin-configuration-settingszip file should now appear in a list.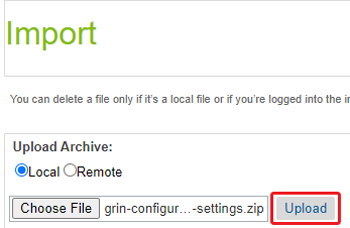
- Select the
grin-configuration-settingsfile from the list and click Import. - Click OK when prompted.
Part 3: Connecting to GRIN
Now that you’re set up in Commerce Cloud, you can integrate with Commerce Cloud in a few ways across GRIN: from the App Marketplace, from within your Brand, and from your Integrations Settings. Each method has similar steps.
Integrating from the App Marketplace
- Navigate to Account > App Marketplace. This will open the App Marketplace page.
- Find the Salesforce Commerce Cloud integration by either:
- Searching “Salesforce Commerce Cloud” in the search bar.
.png)
- Navigating to the Ecommerce App Category.
.png)
- Click the Salesforce Commerce Cloud integration’s Request button. This will open the Request access to Salesforce Commerce Cloud popup.
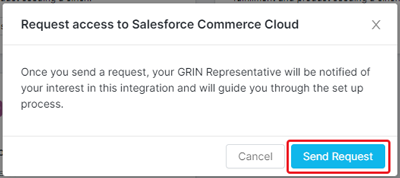
- Click Send Request.
- Once Salesforce Commerce Cloud is enabled for your account, click the Salesforce Commerce Cloud integration’s Connect button. This will open the Connect Salesforce Commerce Cloud modal.
- Select your Brand you want to connect Salesforce Commerce Cloud to. You cannot integrate Salesforce Commerce Cloud with a store that already has a store connected to it. If you do not have any Brands created yet, you’ll be prompted to create one before connecting with Salesforce Commerce Cloud.
.png)
- Enter the remaining fields: your Salesforce Commerce Cloud URL, Site ID, API Client ID, Business Manager User Login, and Business Manager User Password.NoteIn the future, Salesforce will prevent external OCAPI connections using the *.demandware.net hostname.
Although using this hostname will continue to work until then, we recommend you preemptively create a vanity domain and connect to it now. This will prevent any connection issues in the future when Salesforce implements its change. You can read more about this change and vanity domains in Salesforce's article. - Click Connect. If you see a popup to log in to your Salesforce Commerce Cloud account, complete the login process.
.png)
Your Salesforce Commerce Cloud account should now be connected to your Brand and account.
Integrating from Your Brand
You can also integrate with Salesforce Commerce Cloud directly from your Brand you want to connect it to. To do so:
- Navigate to Brands.
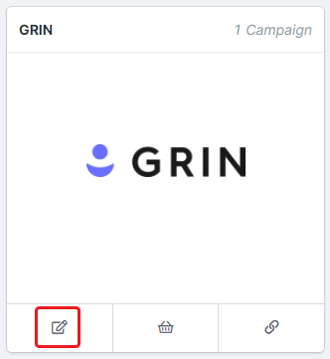
- Click the Edit Brand icon under the Brand you want to connect your Commerce Cloud store to. This opens the editing window for that Brand.
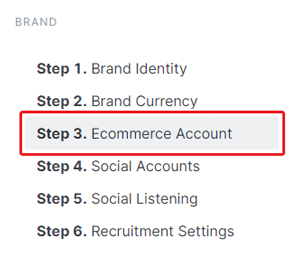
- Click Step 3. Ecommerce Account.
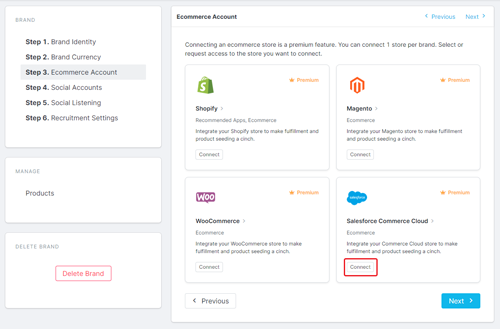
- Click the Connect button underneath the Salesforce integration.
- Fill in the fields appropriately.
- Instance URL: the URL for your Commerce Cloud instance, gathered from the Business Manager.
- Site ID: the name of your Commerce Cloud instance, also from the Business Manager under Administration > Sites.
- API Client ID: the id of the API client created in Account Manager.
- API Client Password: the password for the client you created in Account Manager.
- Business Manager User Login: the user login for the Business Manager user you created. This can differ based on which Manager you used to create the user.
- Business Manager User Password: the password for the Business Manager user you created.
- If you created the user through the Business Manager: the User Login is the username.
- If you created the user through the Account Manager: the User Login is the user’s email address.
- Click the Connect button and wait for GRIN to verify the connection.
Part 4: Configuring Settings
Now that you’ve connected to GRIN and you’ve installed the cartridge, you must now configure a few settings between GRIN and SFCC so your payments, shipping, and orders are fulfilled correctly. You’ll be adjusting settings in both the GRIN Connection Settings and the Business Manager’s Custom Preferences.
Configuring Orders and Shipping Settings
Before you can create orders from within GRIN, you must set your payment and shipping methods for either your domestic or international influencers - or both if you have them.
Specifically, you must provide an SFCC payment method and ID to GRIN. This is because GRIN always adds order and shipping-level price adjustments to orders it makes, displaying the balance due as $0.00 and not requiring a payment instrument. However, because SFCC requires a valid payment instrument regardless, you must create one within SFCC and provide it to GRIN.
You can also use the
int_grin cartridge code to control the Confirmation Status, Export Status, and Payment Status for orders after they’ve been submitted.- Go to your Business Manager.
- Navigate to Merchant Tools > Ordering > Payment Methods. This opens the Payment Methods management window.
- Click the New button to create a new payment method.
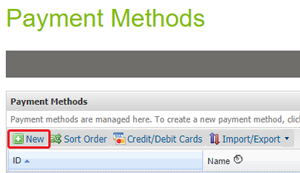
- Enter an ID for the payment method.
- Add a Description.
- Set the Payment Processor to None.
- Set the remaining fields as appropriate.
- Click Apply.
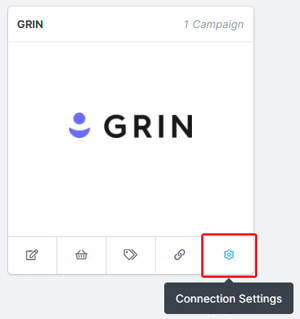
- Go to your Brand’s Connection Settings in GRIN.
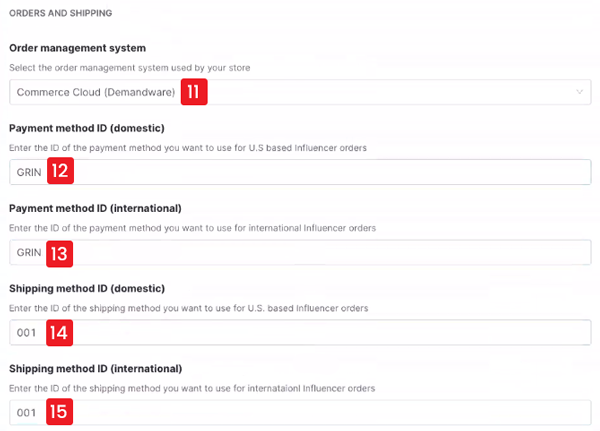
- Scroll to the ORDERS AND SHIPPING section.
- Set the Order Management System to Commerce Cloud (Demandware).
- Fill in the Payment method ID (domestic) with your domestic payment method’s ID. If you do not have domestic Influencers, leave this field blank.
- Fill in the Payment method ID (international) with your international payment method’s ID. If you do not have international Influencers, leave this field blank.
- Fill in the Shipping method ID (domestic) with your domestic shipping method’s ID. This does not have any special requirements and can be set to any existing shipping method. If you do not have domestic shipping orders, leave this field blank.
- Fill in the Shipping method ID (international) with your international shipping method’s ID. This does not have any special requirements and can be set to any existing shipping method. If you do not have international shipping orders, leave this field blank.
- Enable or disable the option to set the order shipment as a gift.

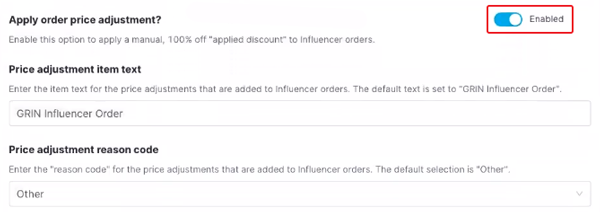
- Enable or disable the option to apply order price adjustments. This determines if discounts will apply to the full order’s total. If you enable it, you must provide a few extra fields:
- Price adjustment item text: what the order will be named in the invoice in SFCC.
- Price adjustment reason code: the reason code for the price adjustments that will appear in SFCC.
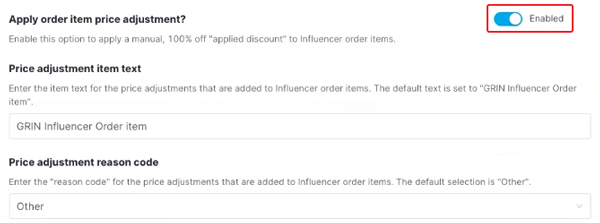
- Enable or disable the option to apply order item price adjustments. This determines if discounts will apply to individual items in an order. If you enable it, you must provide a few extra fields:
- Price adjustment item text: what the order will be named in the invoice in SFCC.
- Price adjustment reason code: the reason code for the price adjustments that will appear in SFCC.
- Provide Order Attributes as appropriate for your SFCC.

Your Orders and Shipping settings have now been set up! There are a few other fields that can be set in GRIN’s Connection Settings, but the ones listed above are the absolute minimum that needs to be set for your orders to be fulfilled correctly through GRIN.
Part 5: Configuring Your Commerce Cloud
Now that you’ve configured your GRIN settings, you must configure your Commerce Cloud’s settings. These settings will control how your orders will be processed in SFCC once they are created. You can also choose how to handle orders’ post-processing. Each Influencer order is created with the subject “GRIN”. To determine how Influencer orders are handled:
- Go to your Business Manager.
- Navigate to Merchant Tools > Site Preferences > Custom Preferences. This opens a list of custom site preferences.
- Select the GRIN cartridge.
- Set each field as desired to handle orders. By default, all four options will be set to Yes.
- Automatically place orders: Set this to No if you want to completely avoid post-processing. If this is done, GRIN orders will come in as “Created”, and you will have full control over their journeys.
- Automatically confirm orders: Determines whether the Order Status will be set to “Confirmed” automatically.
- Automatically set orders as ready for export: Determines whether the Export Status will be set to “Ready for Export” automatically.
- Automatically mark orders as paid: Determines whether the Payment Status will be set to “Paid” automatically.
Congratulations! You’ve finished integrating SFCC into GRIN with full functionality and capabilities! Any orders your Influencers make in GRIN will now fulfill orders in your SFCC and automatically complete payments and shipping based on your settings.

