- 08 Nov 2022
- Print
- DarkLight
- PDF
Managing Your Activation's Conversions
- Updated on 08 Nov 2022
- Print
- DarkLight
- PDF
Your activation’s Conversions tab shows all the revenue you’ve made from your creators’ affiliate links and discount codes. You can also export, filter, and follow up with your listed creators. Since Conversions shows each individual link or code conversion as well as your total conversions, this tab is a great place to see the revenue and return on investment your creators are making for you in your activation!
What You'll Need
Affiliate link groups and/or discount code groups set up for your Brand you’ve created an activation for
An existing activation with the following settings configured:
- Conversion Tracking: enables the Conversions tab
Affiliate links and/or discount codes assigned to your creators, which can be done in an activation’s Workflow > Assign Codes
How to Do It
To get started, navigate to Program > Activations > Your Activation > Conversions. This will open the Conversions tab. There are two parts to this tab:
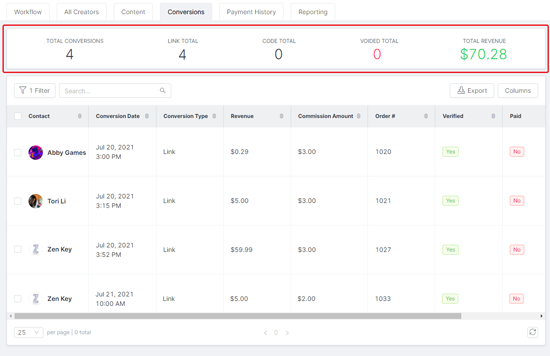
- Overall conversion metrics: shows your activation’s total conversions, link total, code total, voided total, and total revenue . These update live based on each conversion added to the table.

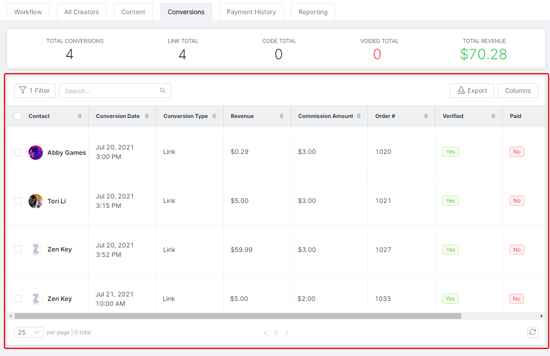
- Conversions table: shows information about each conversion

From this tab, you can organize your conversions table , manage individual creators' conversions, or manage multiple creators' conversions at a time.
Organizing Your Table
The table has a few basic tools you can use. At the top of the table are:
.png)
- Filter: Click to open the Filters side menu and select fields to filter your creators by
- Search: Enter keywords into the search bar to search your list of creators
- Views: Save your current filtered table as a saved view. You can have up to five saved views per table.
- Columns: Click to open the columns popover and customize what columns appear in your table. You can also click on column headers to sort your list of creators in ascending or descending order.
At the bottom of the table are:
.png)
- Lines per Page: Click the dropdown menu at the bottom left of the table to customize how many creators appear per page in the table
- Pages: Click the arrows at the bottom of the table to go to the next and previous pages of your table
- Refresh: Click the Refresh button at the bottom right of the table to manually update your table's data. GRIN automatically refreshes your information periodically, but you can also do so immediately with this button.
Managing Individual Creators' Conversions
Hover over a creator to show individual actions you can take with that creator to the right of the table. These actions are:
- View Content: Click this button to open a new side panel with your creator’s content from all their social networks, their metrics, and a link to Manage your creator’s profile.

- Void Conversion: Click this button to open the Void Conversion? popup and confirm you want to void that conversion. You cannot undo this action.

Managing Multiple Creators' Conversions
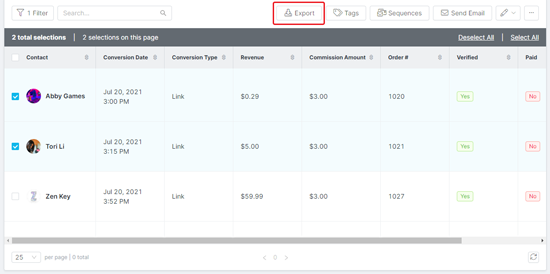
You can click the checkbox next to one or more commissions to display more actions you can take. These actions are bulk actions and will be applied to all your selections. They are:
- Export: Click this button to export a CSV file only of your currently selected commissions.

- Tags: Click this button to open the Tags popover and add tags to your selected commissions.
.png)
- Sequences: Click this button to open the Add contacts to sequence modal and add your creators to a sequence.
.png)
- Send Email: Click this button to open the Send email to contacts modal and send your creators an email.
.png)
- Pen icon: Click this button to further edit your creators’ settings:

- Set Custom Property: assign a custom property to your creators or manage your custom properties
- Change Owner: change the owner of your creators
- Set Relationship Stage: change your creators’ relationship stages with your Brand or manage your relationship stages. The stages are:
- Needs Outreach
- In Talks
- Creator
- Ambassador
- Paused
More options: Click this button to show more actions you can take:
.png)
- Send Alert: opens the Send Alert to contacts popup to send an email alert to your selected conversions’ creators
- Void Conversion: opens the Void Conversion? popup to confirm you want to void that conversion. This action cannot be undone.
- Remove from Activation: opens the Remove Contacts popup to confirm you want to remove your creators from the activations
That’s it! That’s all the ways you can organize and manage your activation’s Conversions . Now you can customize how you want to display your conversions and what information you want to record, export that information into CSV files for your brand to use, and work with multiple and individual conversions at once. Check out the links below for more ways you can manage and organize your activation!

