- 27 Feb 2024
- Print
- DarkLight
- PDF
Setting Up Your Campaign
- Updated on 27 Feb 2024
- Print
- DarkLight
- PDF
Once you've created your Brand and added creators to GRIN then you're ready to start designing your Campaigns. Depending on how you look, Campaigns are creator briefs and the location to tracking the success of your collaborations.
Campaigns are set up to keep your collaborations organized and trackable. Everything from content, product fulfillment, and reporting is kept in one place in order to seamlessly manage high-level and individual progress.
When setting up a Campaign, it is important to review each step below to establish how you would like to manage your creator collaborations:
Step 3. Notification Preferences
Creating your Campaign
You are easily able to create multiple campaigns each tailored to the type of collaborations you would like your creators to partake. Creators can also be placed in multiple campaigns to contribute to different collaborations, separated within their unique Live URL.
Step 1 Click the Program icon and select Campaigns.
Step 2 Click the + Create button in the upper right-hand corner to start creating your Campaign.
Step 1. Campaign Settings
Under Brand Settings, you are able to adjust the internal settings visible only to the users of the GRIN account.
If you have multiple Brands, select the Brand where you want to draw product from and base your affiliate links and discount codes off of. Enter an Internal Campaign Title to differentiate between other campaigns.
Select the Team that has visibility and who can edit the campaign. Set your Campaign budget to keep track of your Spend within the campaign's reporting section.
Set the Campaign Dates as Scheduled or Ongoing, if scheduled you have control over how long content can be pulled into the campaign and until how long you will accept proposals. Campaigns will not be visible to creators outside of the proposal dates.
Establish if you would like your creators to submit more than one proposal. This is ideal if you would like to run a long-term campaign and offer the option to send more product.
Once you have set up your campaign and reviewed it using the Live URL Preview, allow your infleuncers to view the campaign by selecting Yes for 'Visible to Infleuncers?'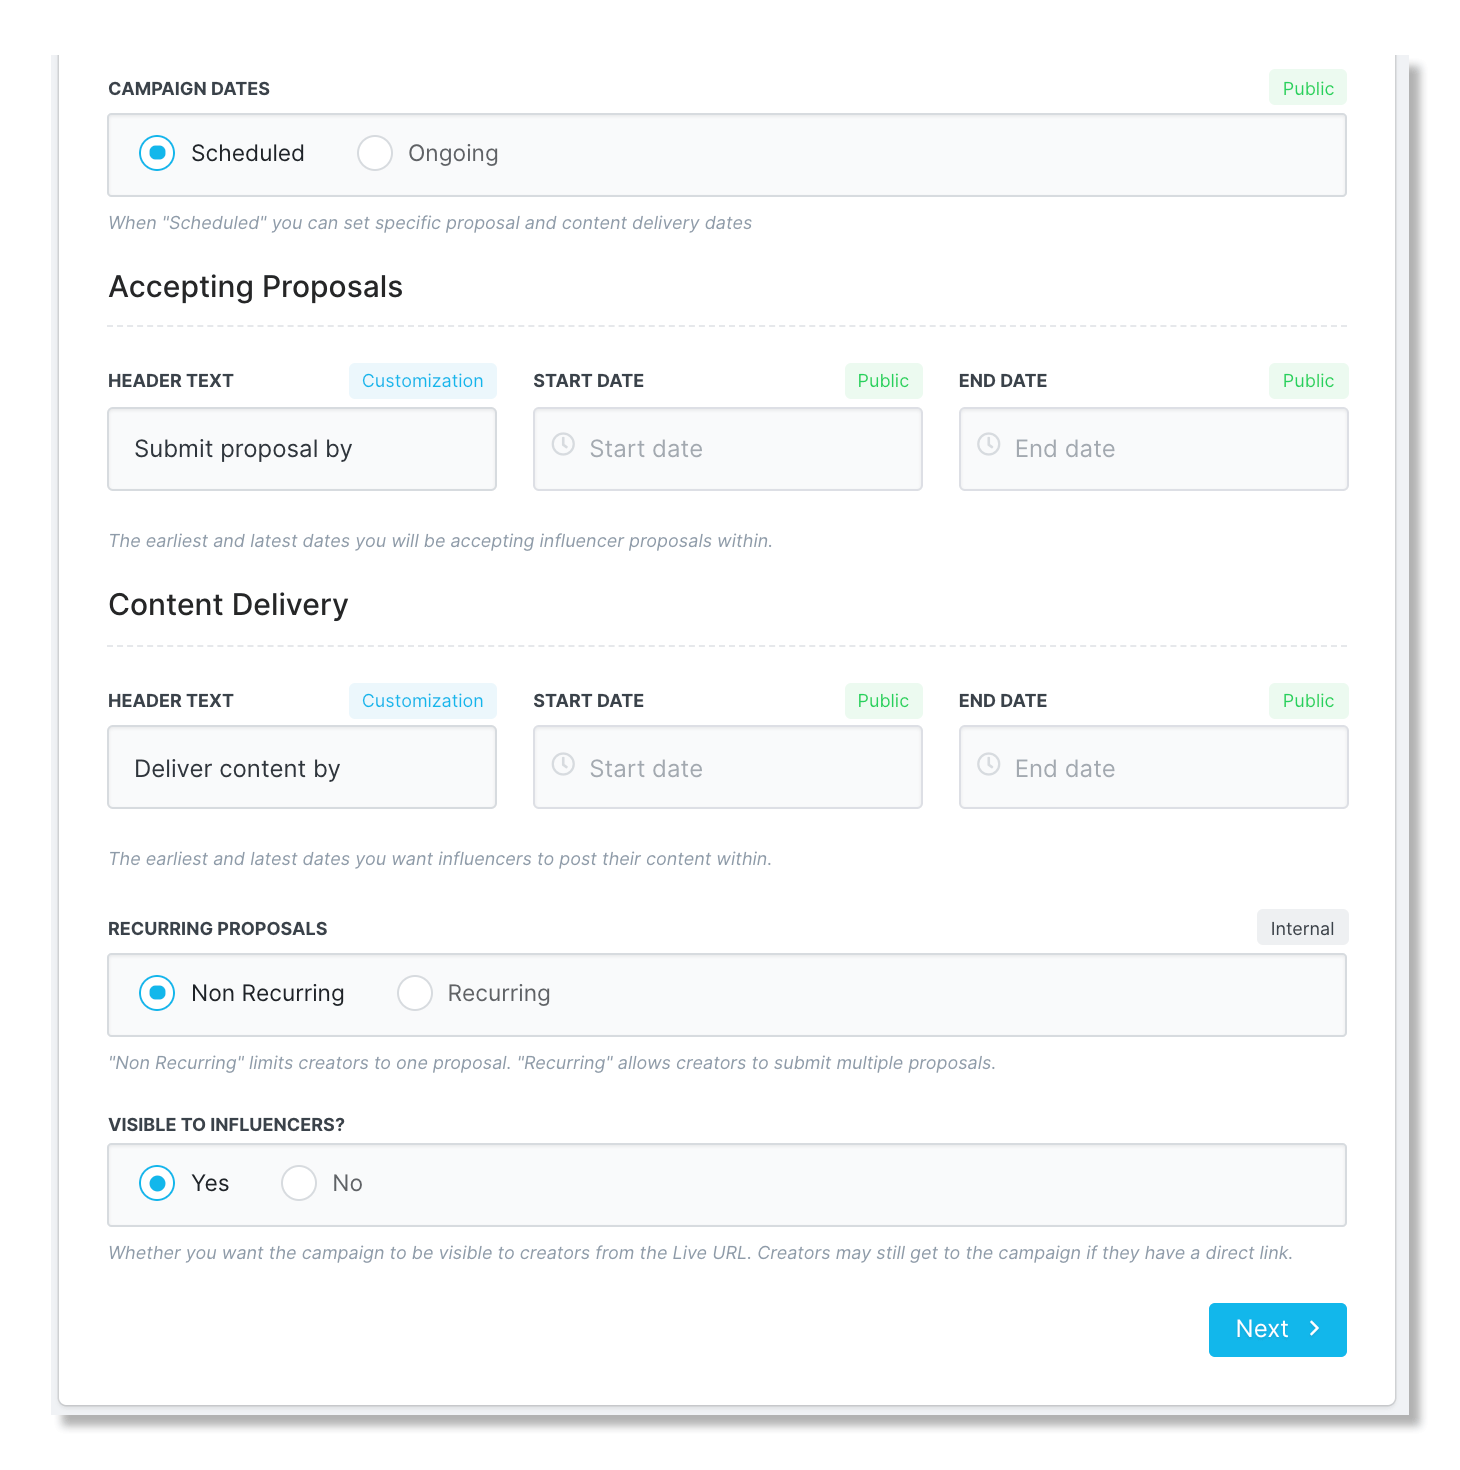
Step 2. Live URL Settings
Under Live URL Settings, you are able to customize what is visible to your creators. Create a campaign title and short description. However, if you have creators in multiple campaigns then add a differentiating title or a campaign preview.
Provide a longer description, under Campaign Overview Description, of what you would like your creators to accomplish and why you want them to participate in your collaboration.
Customize the Header text within the Live URL visible to your influencers by changing the default sections to headers of your choice.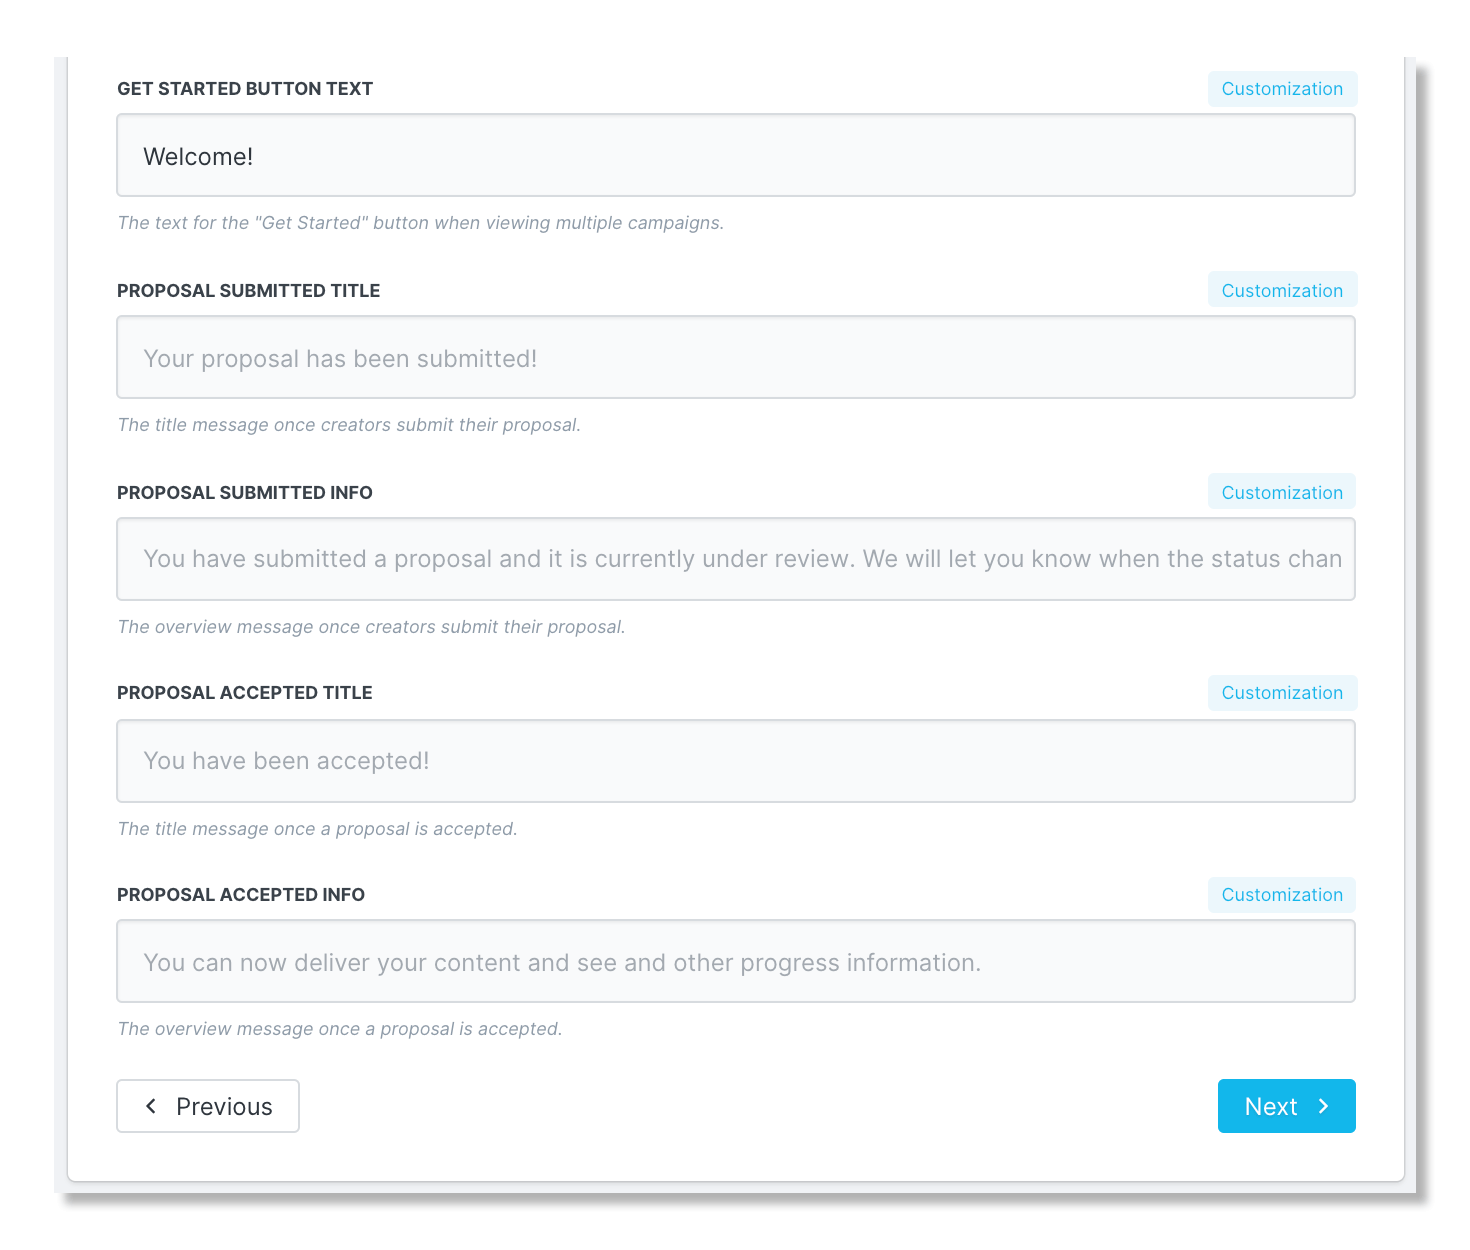
Step 3. Notification Preferences
Send automatic responses to your creators when you have accepted or declined their proposal. Insert pre-made templates and email variables to ensure your emails are personalized to each creator.
Or if you prefer, send manual emails to accept or decline your creators proposals once you have set up your campaign.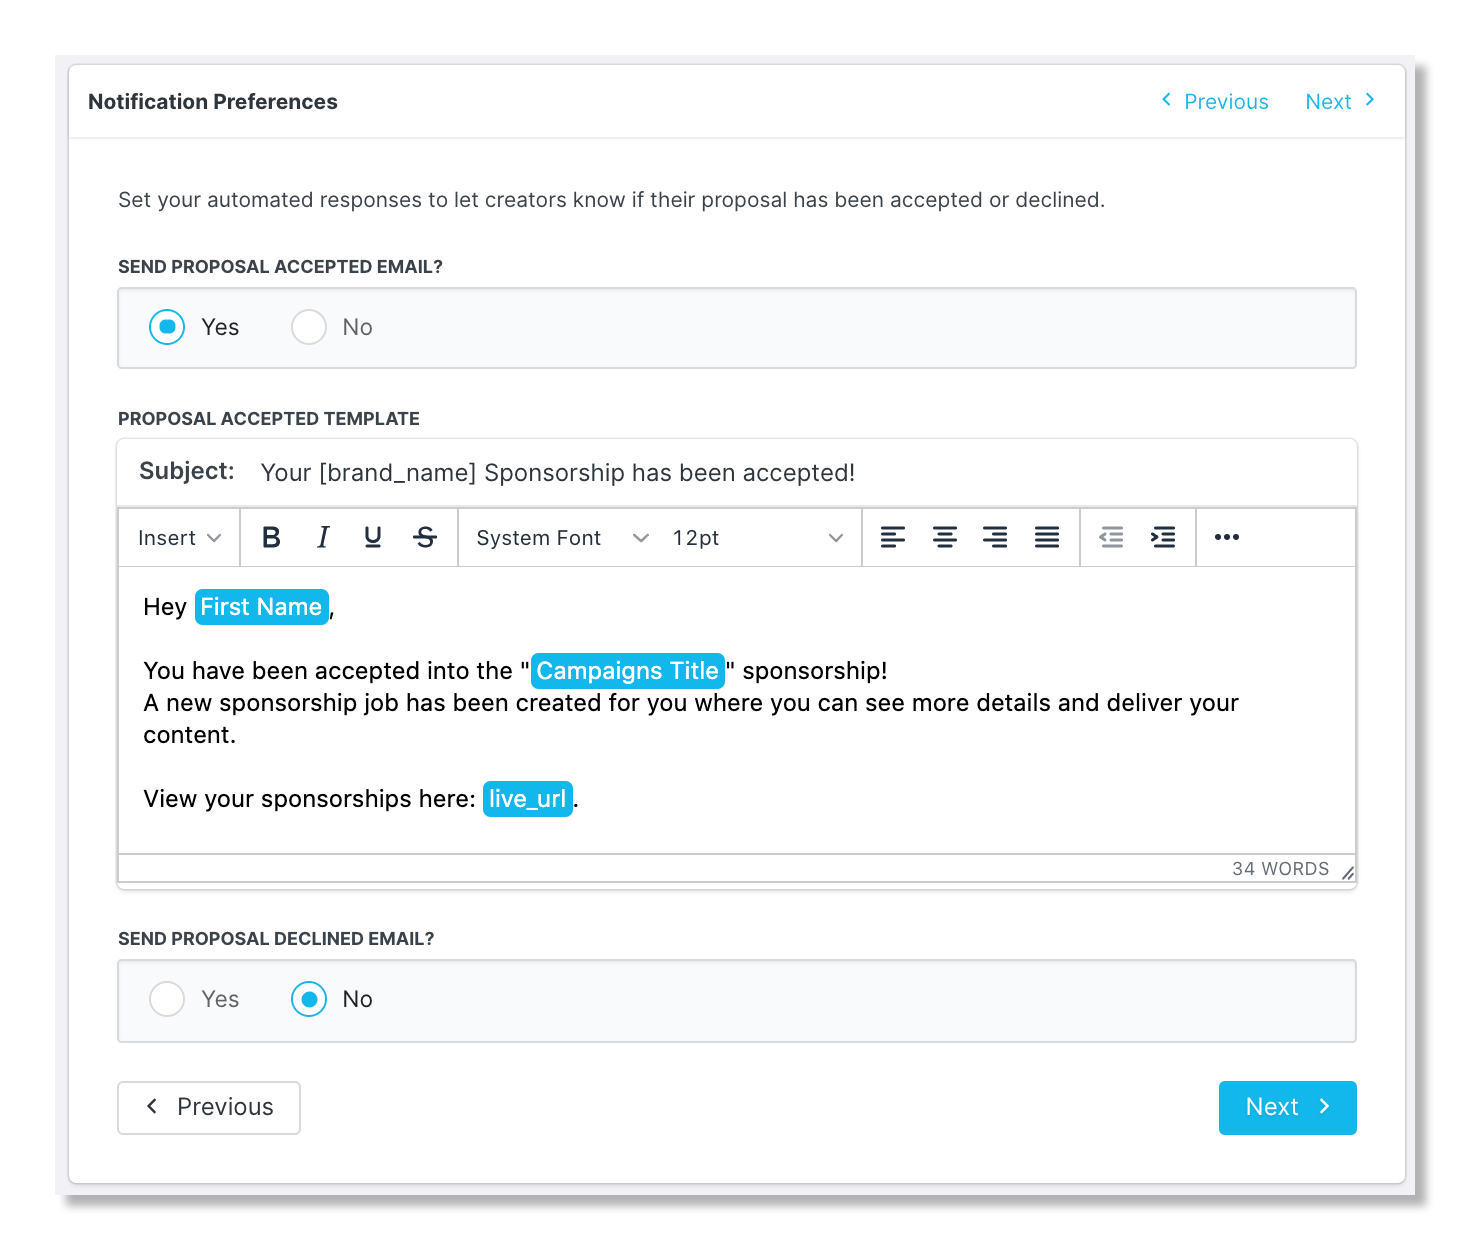
Step 4. Compensation
Within 'Step 4. Compensation', you can begin setting up the compensation you are going to offer your creators. You have the option to choose Payment, Commission, and/or Product as compensation methods.
Provide a brief description of the compensation that will be offered and how it will be sent to them.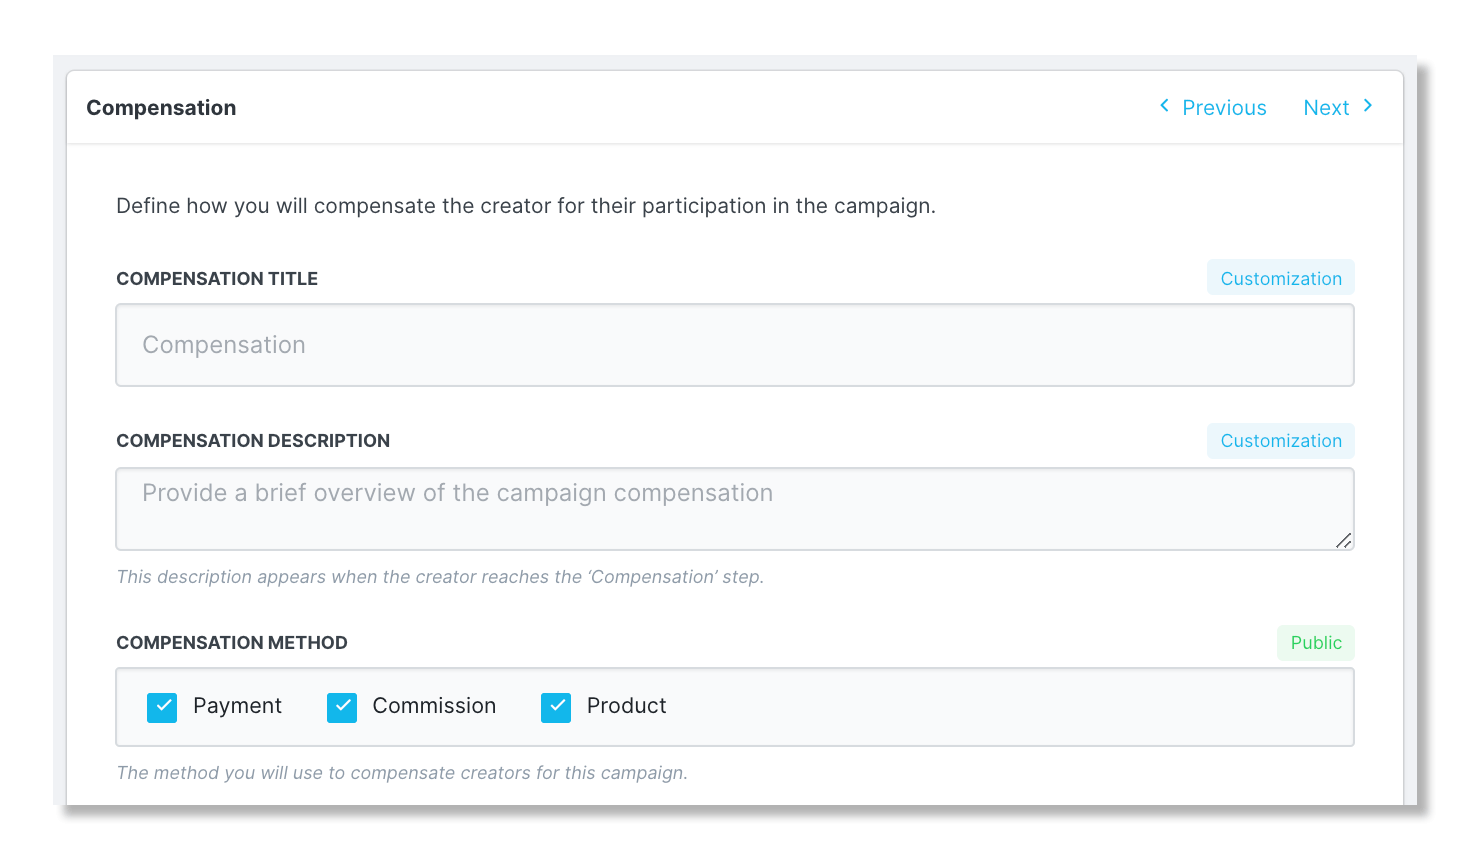
Payment
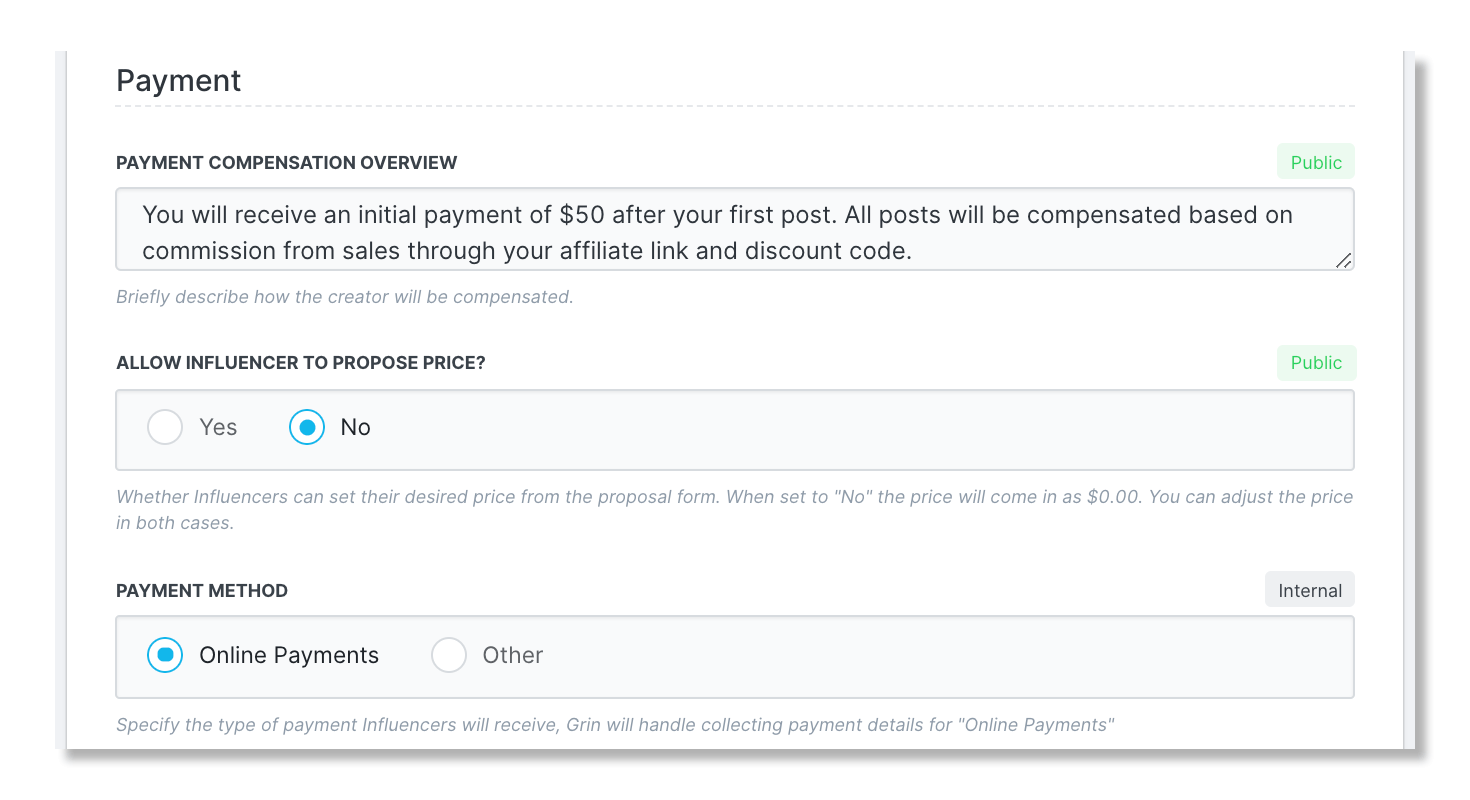
If you selected "Payment" as a compensation method, enter a Payment Compensation Overview describing how and when your creators will receive payment. You also have the option to allow your creators to propose their own price as well as options to negotiate after the proposal has been submitted.
GRIN offers the ability to pay through the GRIN platform, funds will need to be added to your account, and your creators will need to submit Payout forms (Paypal & tax form) in order to receive payment through GRIN.
Commission
If you selected "Commission" as a compensation method, then enter a Commission Compensation Overview, select a Discount Group and/or an Affiliate link group, and select how the commission will be paid, either via GRIN or Other.
Product
If you selected "Product" as a compensation method, then enter a Product Compensation Overview and click Next to proceed to product selection.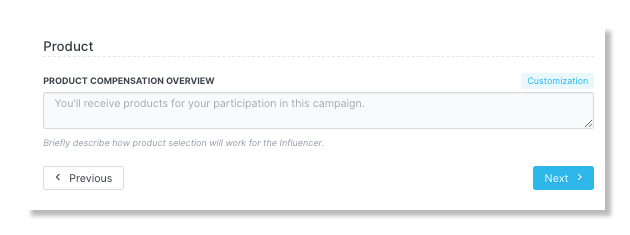
Step 5. Select Products
Within Step 5. Select Products, you have the option to customize the heading seen within the Live URL, otherwise, the default heading is Products. Provide a product description or if your creators are limited with what they are able to select.
You also have the option to customize an Out of Stock message and the request to make sure their shipping information is correct and up to date.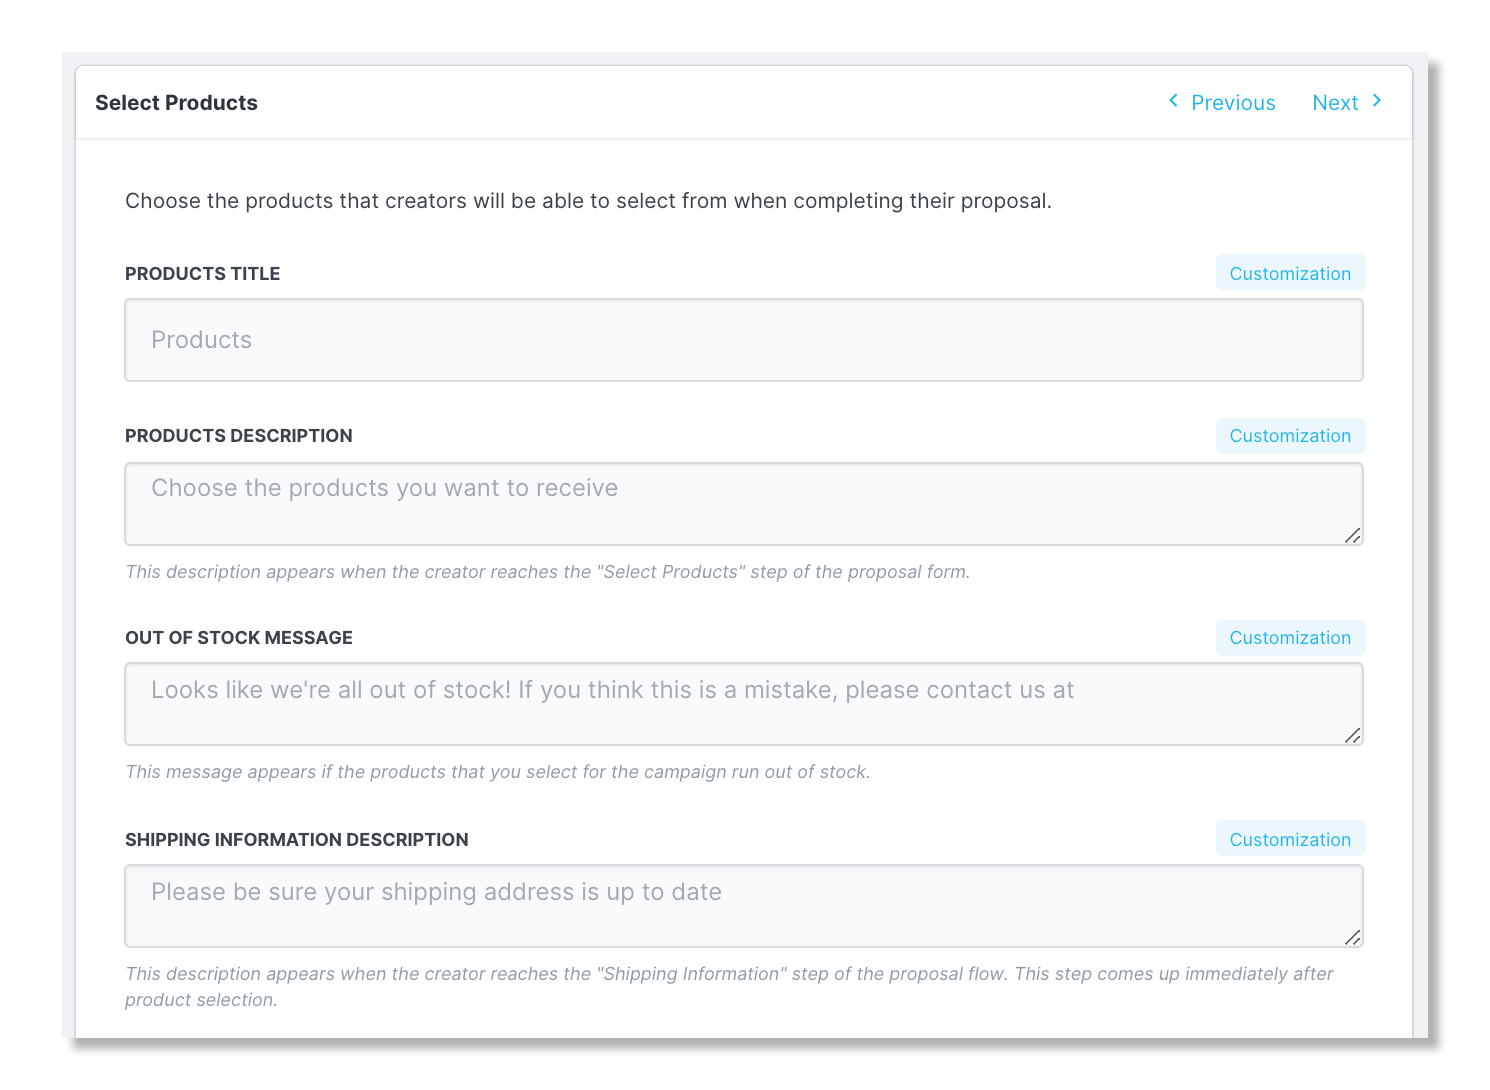
Next, select whether you would like your creators to choose their own products and if you would like to show product prices.
You also have the option to limit how many products your creators are able to choose or limit based on a max product price. If a limit is added to restrict based on total number of products, then the option to restrict by collection will appear.
You also have the option to have your creators choose products directly from your website. Once products have been chosen, they will copy and paste the checkout URL within the Live Site and the chosen products will be displayed to be submitted with the proposal.
The option to use URLs for product selection is unavailable if you joined GRIN after August 22, 2023 or for any Campaigns created after August 22, 2023. We recommend creating an Activation instead to allow creators to select products with URLs.
Lastly, click Add Products to add in your products to be available within the Live Site.
Step 6. Tasks
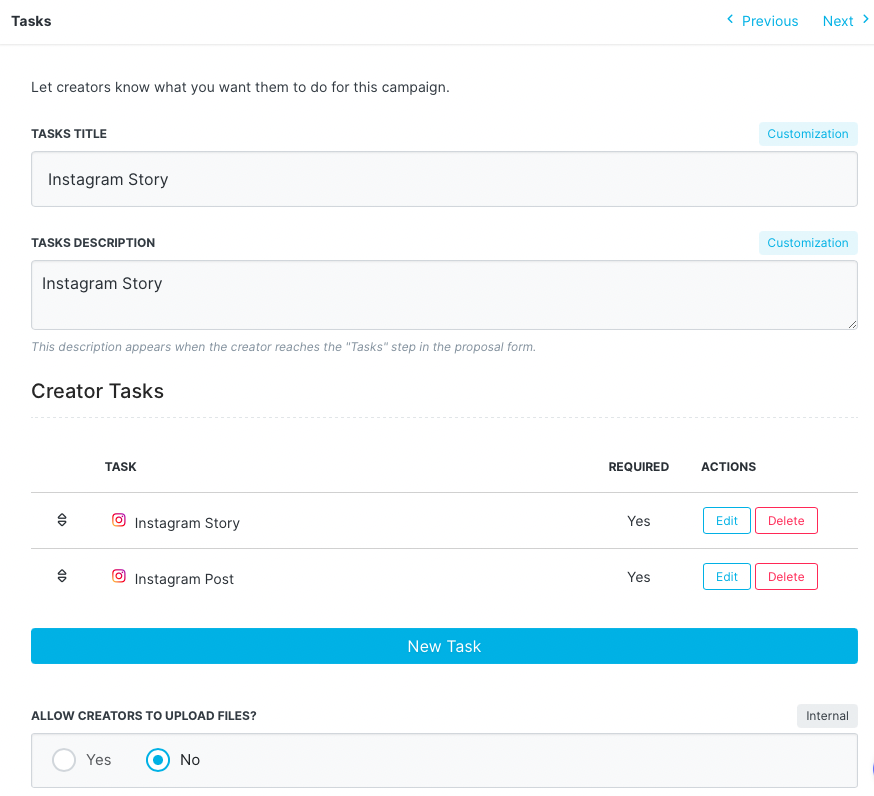
Within Step 6. Tasks, enter a customized task title or leave empty to default to Review Tasks. The task description is the perfect place to let your creators know what you expect from them, as well as what you would like your creators to do in exchange for the compensation you will provide them.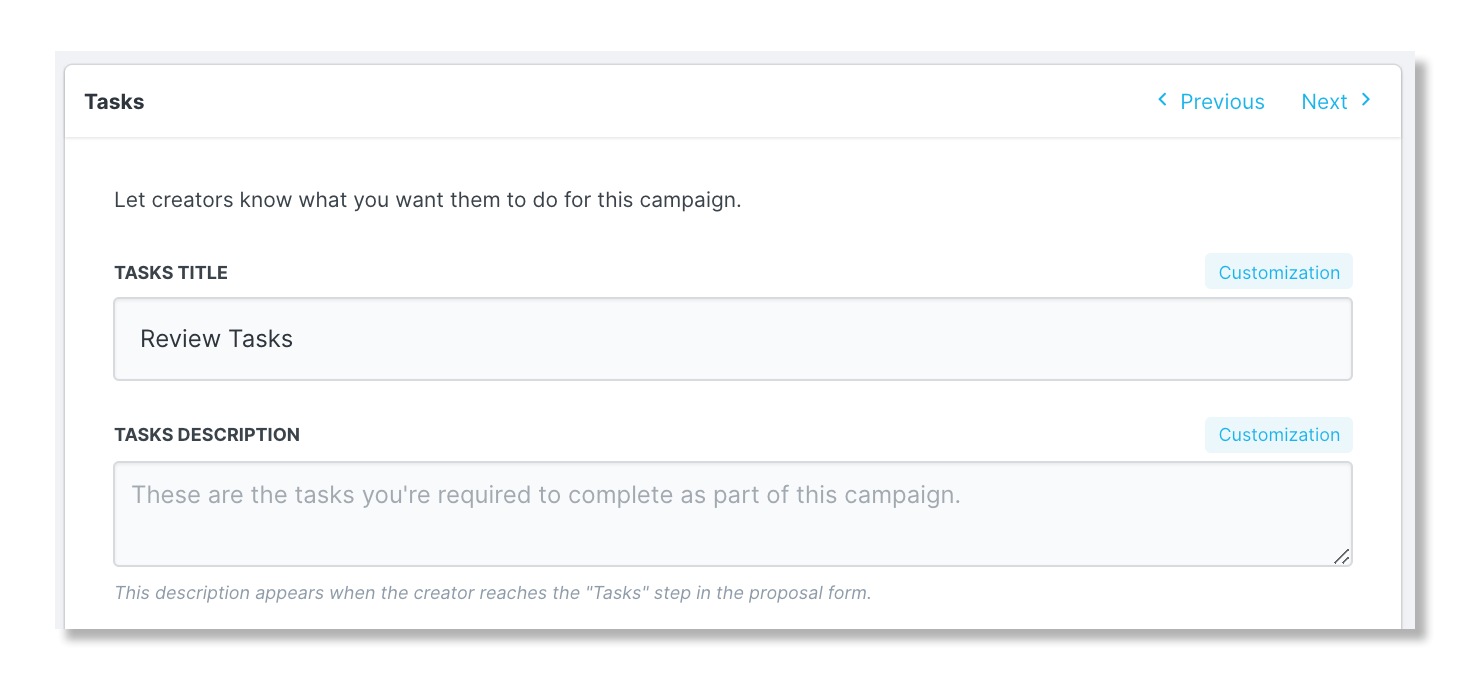
Under Creator Tasks, click on New Task and begin to add in the tasks you would like your creators to complete for their campaign collaboration.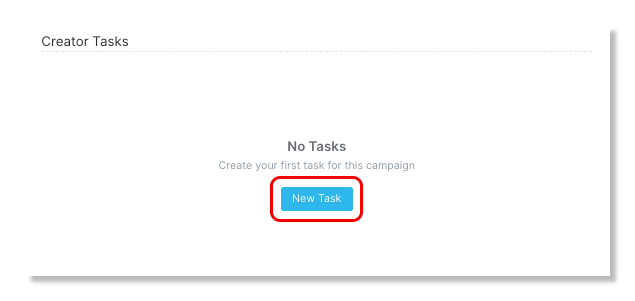
Next, select whether you would like your creators to be able to upload files. It's recommended to allow this option if you would like your creators to upload files of their content for approval before posting on their social accounts.
Lastly, in order for their content to seamlessly pull in to GRIN, creators are required to connect their social network accounts. This connection lets brands view creators' posts, insights, and metrics and pull them into GRIN.
Step 7. Tracking
Tracking hashtags and/or mentions are needed in order for GRIN to locate and pull in creator content.
Your brand must connect an Instagram account in order for content to be pulled in for Social Listening content. You can learn how to do this while setting up your Brand in Creating Your Brand.
Enter a tracking description to inform your creators of the importance of using the exact tracking hashtags provided.
Under Revenue Tracking, you will have the option to add in a discount code group and/or an affiliate link group for tracking purposes only. If you had chosen commission, then revenue will be tracked automatically without the need for choosing a revenue tracking options.
You also have the option to allow your creators to view their affiliate link and/or discount code within the Live Site or not. If the creators are not allowed to view their link and code on the Live URL you are able to instead send an email including their code/link variable.
![]()
Step 8. Other Information
Under Step 8. Other Information, you have the option to request additional information that is not available within the other steps of the campaign setup. Additional fields, such as gender, exercise preference, etc. can be created within Custom Properties and included on the Live Site.
Customize the title and description of the Other Information section to be in line with the theme of what you are requesting from your creators.
Step 9. Brand Assets
Under Step 9. Brand Assets, import files to assist your creators to know how to style their posts that is in line with your brand's image. Customize the title and description and include details on why your creators should consult these documents.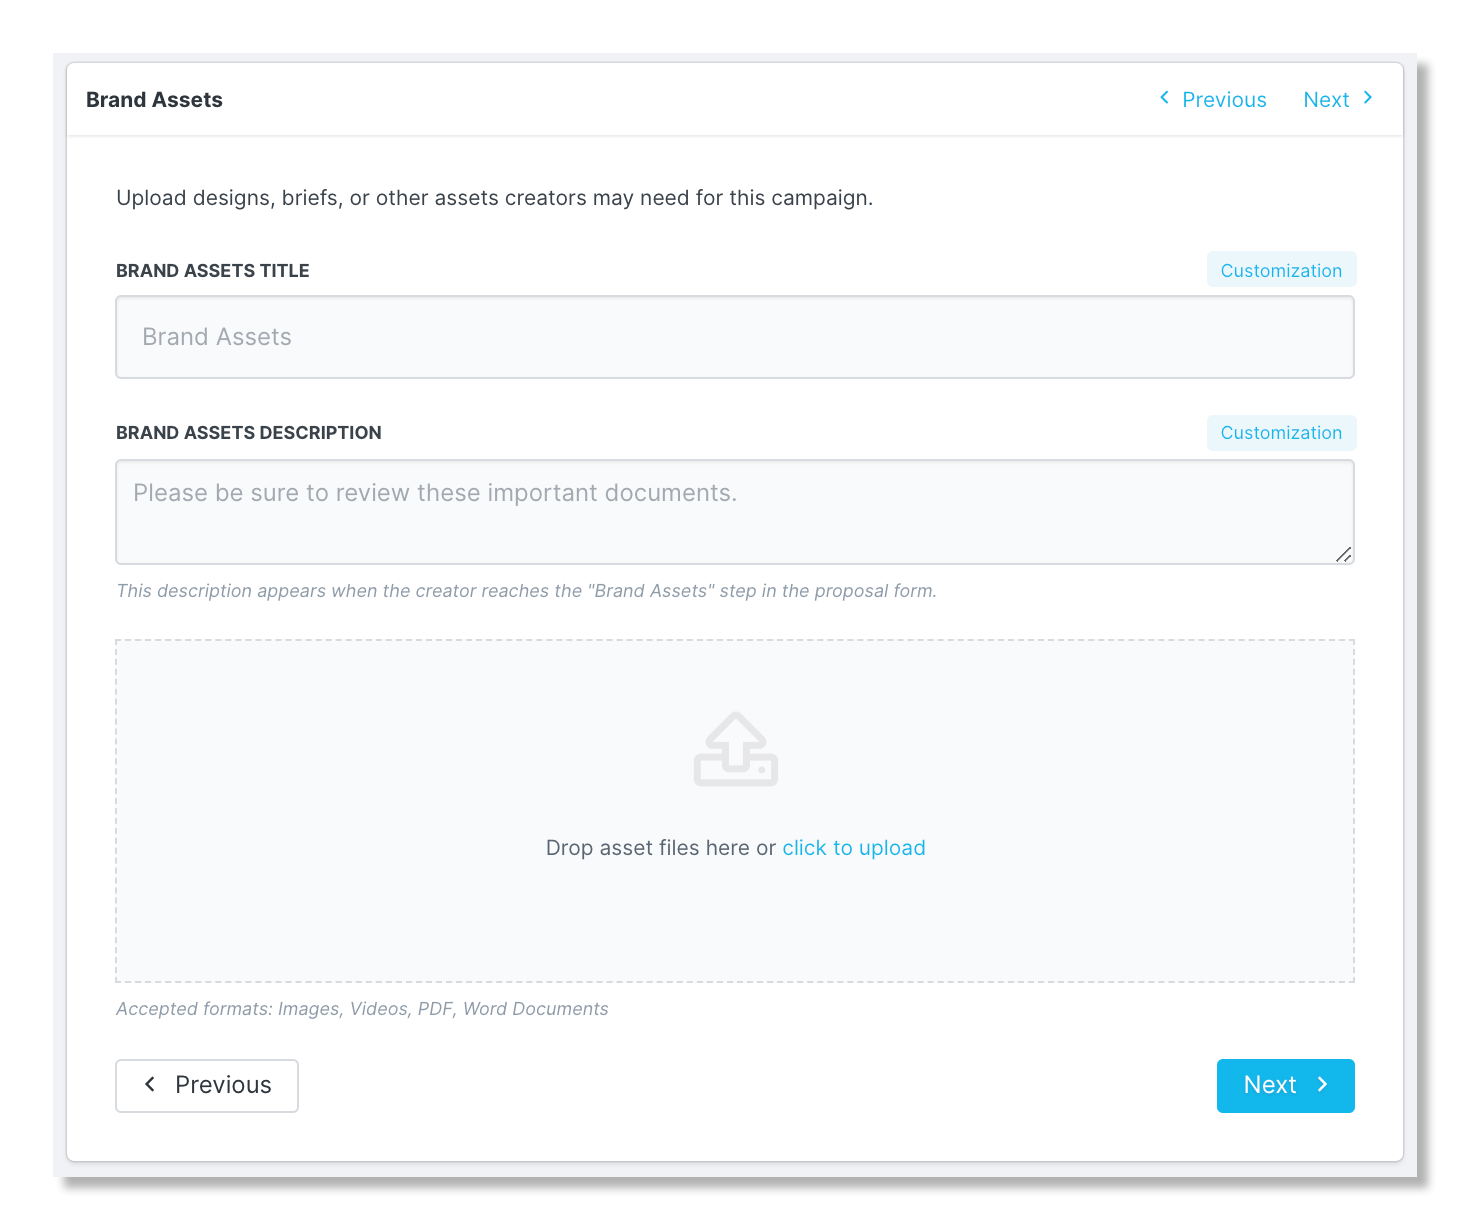
Step 10. Content Rights
Within Step 10. Content Rights, select the content rights you would like to include or enter your own custom rights, and save your campaign.

