- 13 Sep 2024
- Print
- DarkLight
- PDF
Setting up Affiliate Tracking for Any Website
- Updated on 13 Sep 2024
- Print
- DarkLight
- PDF
You can assign affiliate links to your creators and track how those links are used with affiliate tracking. With affiliate tracking, you can see how many page views, sales, and commissions your creator’s unique link has generated. This lets you not only easily pay out your creators, but track where your most successful conversions are.
Different ecommerce stores and websites have different steps for affiliate tracking. If you want to set up affiliate tracking with an ecommerce store instead, check out our other articles on setting up affiliate tracking with Shopify or WooCommerce.
What You'll Need
- Access to your website’s HTML. If you use Google Tag Manager, you can also include our script through it to be included on every page.
How to Do It
You can set up affiliate tracking with any website via the App Marketplace or your Integrations Settings.
To set up affiliate tracking from the App Marketplace:
- Navigate to Account > App Marketplace. This will open the App Marketplace page.
- Find the Affiliate Integration by either:
- Searching “Affiliate Integration” in the search bar.

- Navigating to the Recommended Apps App Category.
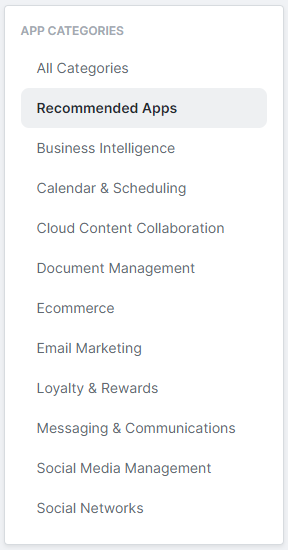
- Searching “Affiliate Integration” in the search bar.
- Click Generate Token on the Affiliate Integration app card. This will redirect you to the Affiliate Integration’s settings in your Integrations Settings.
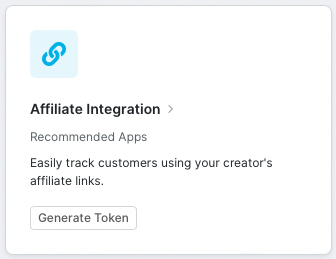
To set up affiliate tracking from your Integrations Settings:
- Navigate to Account > Account Settings > Integrations. This will open a list of your current integrations.
- Click on Affiliate Integration. This will open the Affiliate Integration’s settings.

From here, the steps to set up affiliate tracking for your website are the same:
- If you haven’t generated a token yet, click Generate Token in Step 1: Generate a Token (if you’ve generated one before, you should see the token here instead).
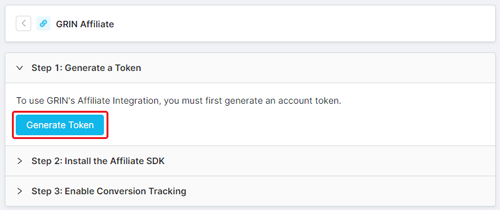
This will generate:
- Your token and the date it was generated.
- A copy button.
- A delete button.
- Click Step 2: Install the Affiliate SDK.
- Click the Copy Install Code button under the Any Website section to copy the script onto your clipboard.
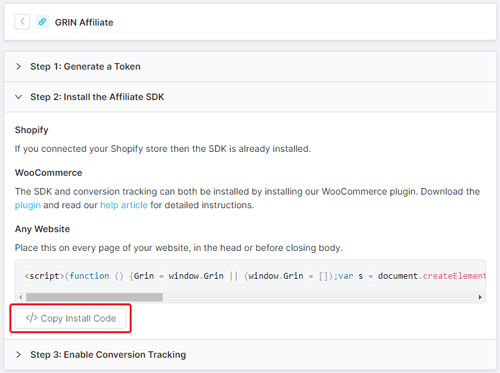
You can also copy the code from below:
< script > ( function ( ) {Grin = window .Grin || ( window .Grin = []); var s = document .createElement( 'script' );s.type = 'text/javascript' ;s.async = true ;s.src = ' [https://d38xvr37kwwhcm.cloudfront.net/js/grin-sdk.js' ; var ](https://d38xvr37kwwhcm.cloudfront.net/js/grin-sdk.js';var) x = document .getElementsByTagName( 'script' )[ 0 ];x.parentNode.insertBefore(s, x);})(); </ script >
- Navigate to your website’s HTML.
- Paste the code you copied in step 3 into the header or before the closing body on every page of your website.
- Go back to your Affiliate Integration Settings in GRIN.
- Click Step 3: Enable Conversion Tracking.
- Click the Copy Success Code button under the Any Website section to copy the script onto your clipboard.
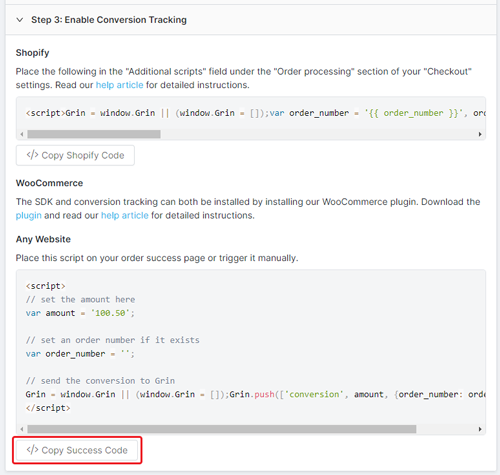
You can also copy the code from below:
< script  >

// set the amount here

var amount = '100.50';

// set an order number if it exists

var order_number = '';

// send the conversion to Grin

Grin = window.Grin || (window.Grin = []);Grin.push(['conversion', amount, {order_number: order_number}]);

</ script  >
- Paste the script into a text editor and update the amount (the subtotal after discounts and before tax and shipping costs) and order_number values to use the variables used by your website. Your site’s developer will likely be the best resource to help you determine what your variables are.
- Copy your script with the updated values.
- Navigate to your website’s order success page.
- Paste the script you copied in step 10 into your order success page.
That’s it! Your website is now set up for affiliate tracking in GRIN. Check out our other articles on creating affiliate link groups and assigning them to your creators to start seeing your creators’ conversions.

